FINALLY. You don’t think I have *just* been caring for a newborn & toddler, do you? Well. Mostly I have, but I have been able to sneak in a few projects here & there. Finding the time to blog them is a whole different story… You’ll be seeing more instagram pictures on here than I’d like. Anything square is IG. :)
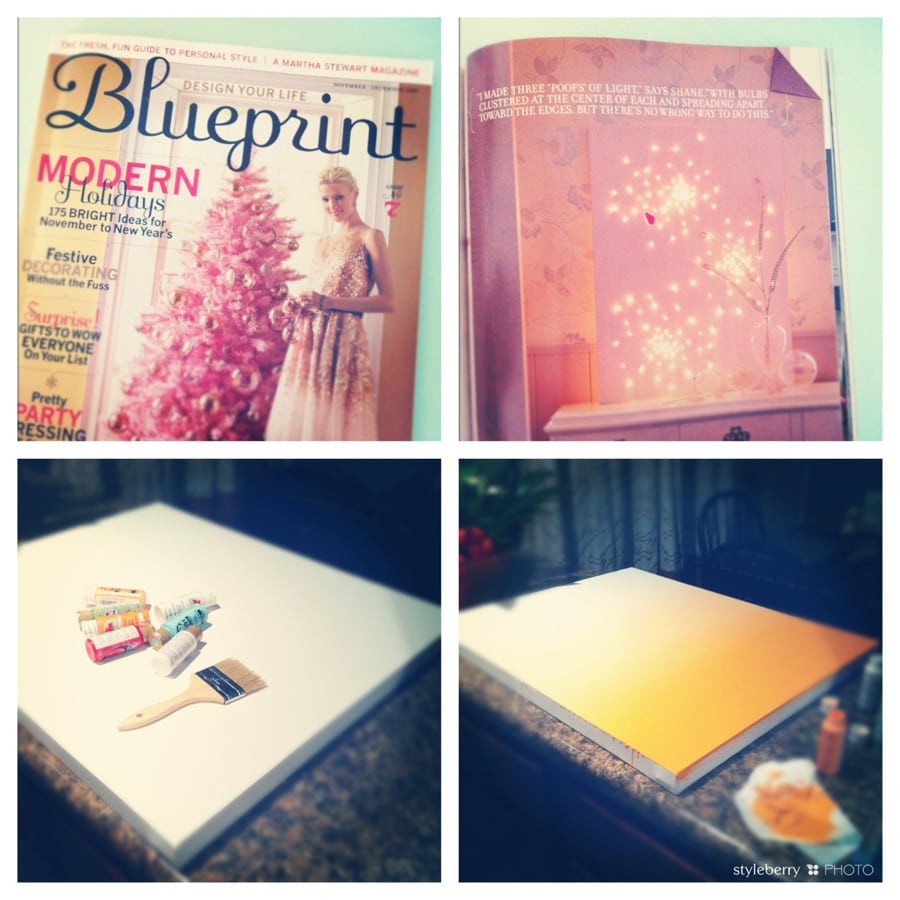
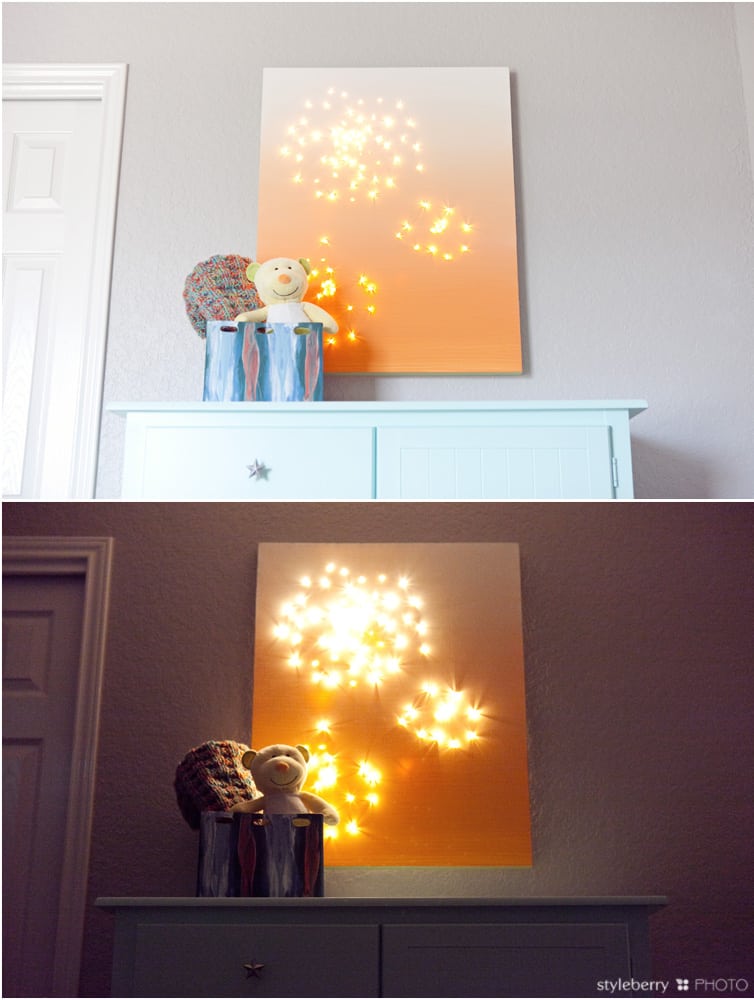
This project has been on my to-do list since I first saw it in Blueprint (RIP) in 2007. Yep. That’s my original copy, complete with red ink stain & all! This was going to be on the feature wall in my nursery if caroline was a boy…but…she wasn’t! & I decided to wait to use it should I get the chance to decorate another nursery. & hip, hip hooray. I DID! It’s now all over pinterest & my version was additionally inspired by Kelly’s ombre version. I cannot tell you how much I love it. I spend plenty of time staring at it in the middle of the night. & I could not be happier with how it turned out! Here’s how I did it:
SUPPLIES
- canvas (mine is 24×30″)
- white twinkle lights (found mine at target in the garden section, 100ct)
- acrylic paint in desired color/s. (You’ll need white & at least one colored shade if you want to do the ombre effect–ombre means “shaded or graduated in tone” just in case you aren’t familiar with the term)
- paintbrush
- water in a squirt bottle
- exacto knife
HOW-TO
- I wasnt sure what I was going to do with the colors, so I grabbed a few from my stash & started to play. I ended up squirting white on one end & orange on the other.
- I started on the orange side & worked the paint over towards the white, but not all the way. I washed the brush clean, then started on the white side working towards the orange. I did this over & over until I had the colors blend just the way I wanted to. I also squirted the canvas with water a bit to help the paint blend better.
- once the top was dry, I painted the edges of the canvas celedon green, just to cover up the runny orange.
- I then took it up to the nursery to decide which color I wanted on top. White it was!
- I marked the middle of my three “fireworks” and started poking holes with the exacto knife.
- After the holes were pierced, I punched the twinkle lights through & just kept going until I liked the pattern. I kept a rough count of the lites, knowing that I should split them into thirds for each firework, a little heavier on the top & bottom two.
- Once it was done, I used an extension cord to reach the lites on the back of the canvas & put them on a remote for an extra easy on/off during those never ending nighttime feedings.
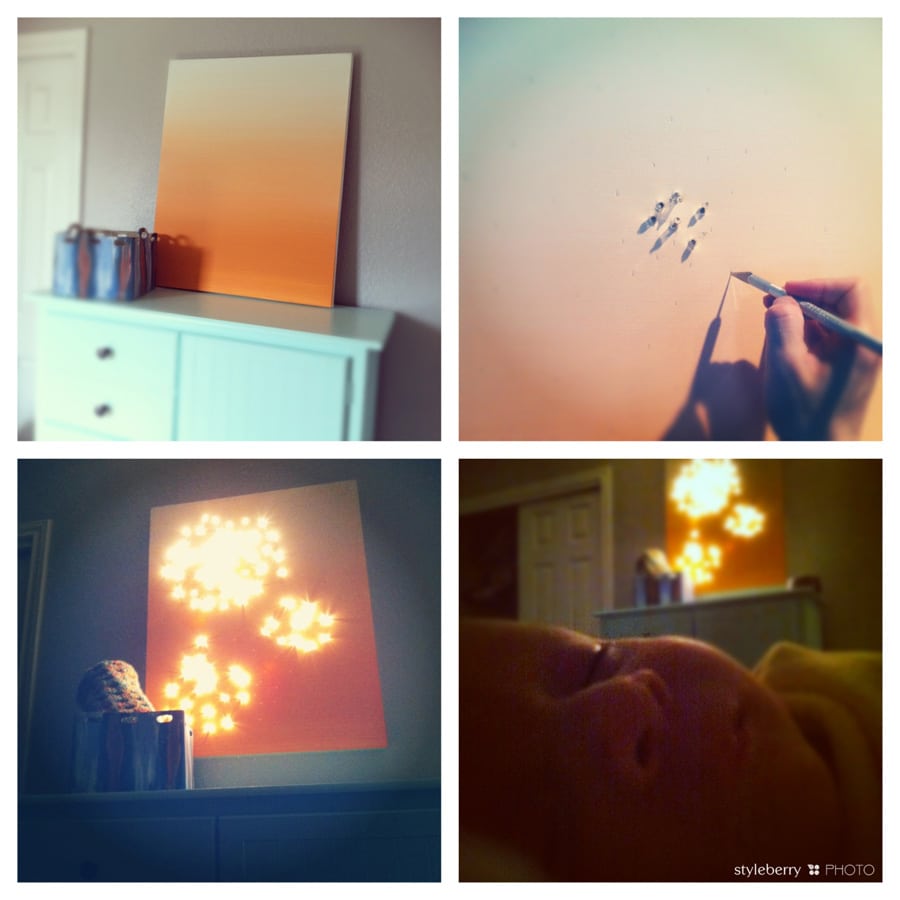
I can’t tell you how much I love it! The best part of the whole thing is how affordable it is–the only new supplies I needed to buy were a canvas & lights. I got the canvas half off at JoAnns Fabrics ($25) and the twinkle lights were $5 at Target. The rest was stuff I had laying around the house.
& now on to decorating the last wall in the nursery! I’ve got three of four done…yea!!

