I’m going to be writing this in fragments, as I have a little girl going “bleh” upstairs…not so fun. But this project is–so on to that!
When we first moved into this house we had three empty rooms. Plenty of space…back then. Fast forward three years and I feel like we are stuffed! Two of those three rooms are going to hold our precious babes and that leaves just one to do the rest of the work–which is to house guests & function as our office space. So I’ve been brainstorming & browsing pinterest and have come up with a compilation of ideas that will hopefully make this space workable. At least until we move in 32 months. [I can’t wait!] I’ll walk you through this transformation since I know I am not the only person trying to make room for babies/guests/work & toys–and I love to see how other people make it work. Luckily, we do have a loft playroom, but other than that–we’ve got four spaces to work with. Our room. Caroline’s room. Nursery #2. & this one:
So this room is the first you see when you walk in the house. It has no doors on it & we are looking to solve that problem very soon. Everything with an “x” on it is soon to be relocated/craigslisted. All that will be in this room is our desk, a day bed and that armoire. Keeping it simple. More on each as we go…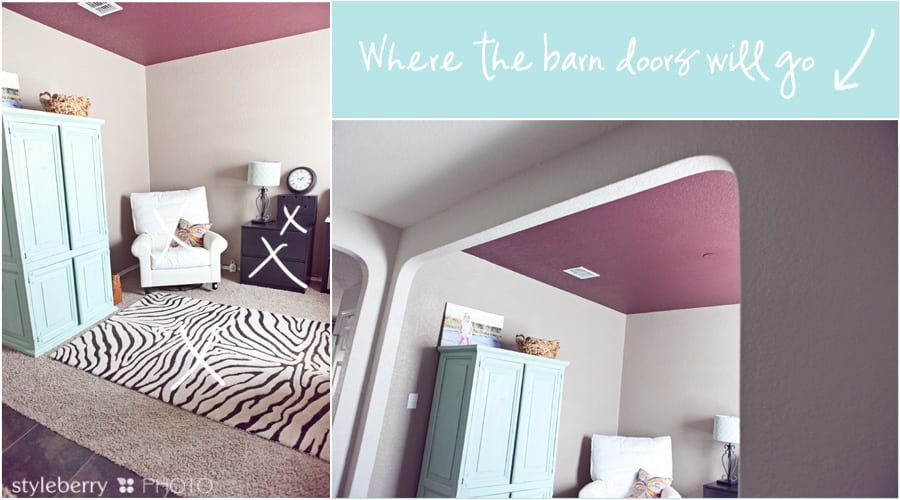
I don’t really want to spend the moo-lah on french doors so I’ve decided that we are going to do barn doors. Big, giant, white semi-glossed doors on a sliding track. This project is my inspiration project. I’m looking to do something very similar. With an end result like this:
Source: kristemichelini.com via miss shawna on Pinterest
Source: kristemichelini.com via miss shawna on Pinterest
That way, I can turn this gem of an armoire 90° counter clockwise, with it’s back to a barn door. It will face the daybed in the corner (where the chair is now). Plans for that are a bit up in the air, but I plan on using some old doors on two sides to box it in, making it feel more like a daybed than a bed (it is queen sized) and pile it with pillows for lounge reading. It will sit opposite my masterpiece…so I can lay & read & admire…ha!
Anyhoo–this is a $100 craigslist find that I scored last week. It came looking like this:
But I had bigger plans. I had a swatch of Sherwin Williams “Aloe” color matched in Valspar testers. I ended up needing three for this project (at $3 each). I then took a rough sanding sponge to the entire thing & roughed it up. I think I’ll still add a coat of polyurethane stain to give it some depth, but I can’t work with poly while pregnant, so it will stay as-is until after baby. Which probably means forever. ;) I had some leftover chalkboard paint that I used on the interior doors. Just for fun.
But this is my masterpiece. Why? Because I am now less SEVEN pieces of furniture!! Ummhmm. This big guy houses the edited contents that used to fill a lot more floor space than had to spare. I spent a weekend really paring it down. The printer, my most used bags & all my hubby’s medical equipment are on the bottom. Up top lies our one (ONE!!) little collection of hanging files, printer paper. My business stuff & some random stuff we use often enough to make easily accessible. My wedding album & negs are about to get packed away elsewhere, so that will free up half of the entire top shelf too. Ahhhhhh. I can breathe. This armoire really did bring me all that I thought it would.
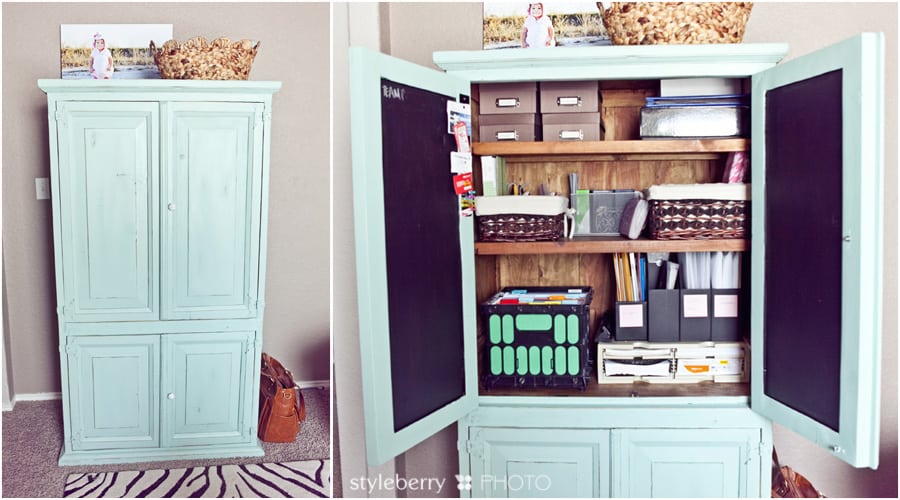
some nice distressing (the key is to start with bare/stripped wood & test is somewhere inconspicuous–I used the bottom of the shelves as my test) I love the paneled sides–this is one sturdy piece of solid wood furniture! Wooooah craigslist!
+ one coat of chalkboard paint!
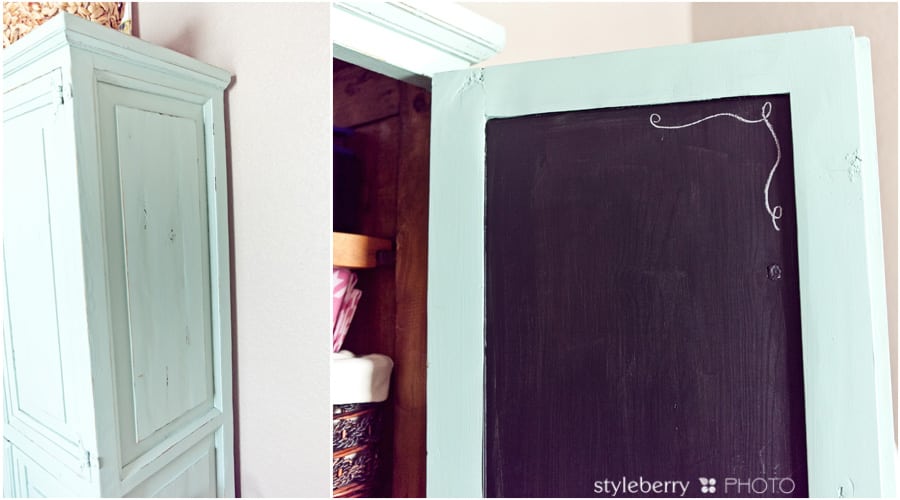
I painted right over the hardware–it’s a little bit “rustic” for my taste, so now it blends in. I still haven’t found the perfect knobs (the white ones went back to hobby lobby)
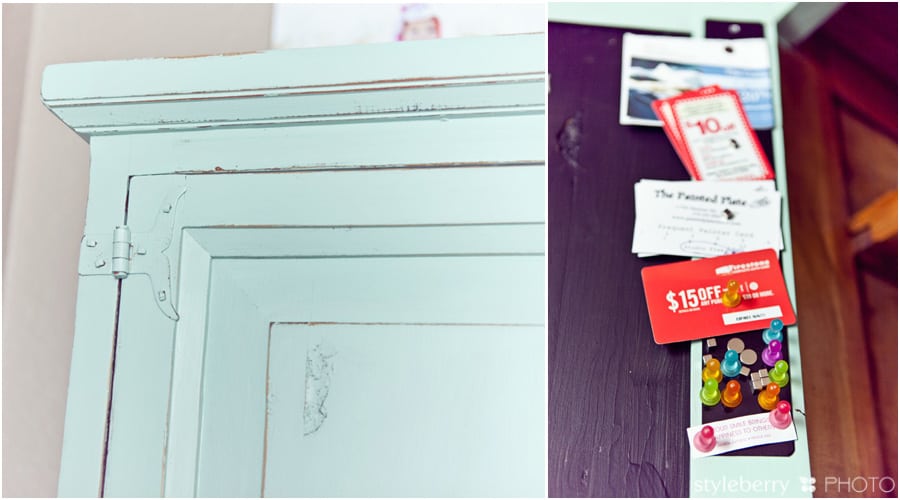
+ I added a magnetic strip on the inside where I will stick all my coupons that I want to keep & see, but don’t want to really see all that often
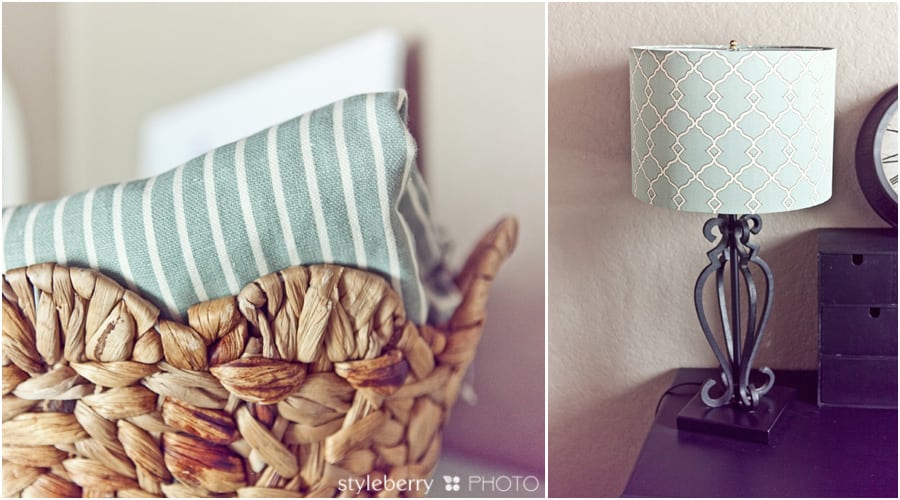
These three pieces were my inspiration for the colors of the room. The fabric I got at hobby lobby months ago on clearance for about $2 a yard (I got 10). The shade is from homegoods. & the basket was on clearance at hancock fabrics for $5. I want sea foamy greens, natural woven fibers & lots of white. Cozy & airy is the goal. Gone is the black that once filled this space…
& the project so many of you have asked/written/emailed me about! Our ikea hack! This is my favorite part of the room. Because we are a military family, I am so hesitant to put money into our home that we cannot take with us. I love the idea of built-ins, but I just know they would be a poor investment for us right now. So, what is the next best thing? Something I like to call the “portable built-in.” ;)
We originally bought four Ikea Expedit bookshelves and ran this desk in a big “L” shape around the corner that the rocking chair is sitting in now. We topped it with your basic MDF, as thick as we could find it (3/4 in) and cut to size. The original had black desktops. But I am currently into all things white & bright. So when we reconfigured this set up, running it in front of the window, I knew I wanted to use as much of that lovely natural light as possible by painting the new MDF tops white. & oof. It reflects. It’s so bright in here! I LOVE it! Plus, the two toned look is really in right now and I thought it would work nicely for the space. We had one bookshelf left over, so we made it into a little “sideboard” so my hubs had some extra space for all of his gigantic books & work stuff.
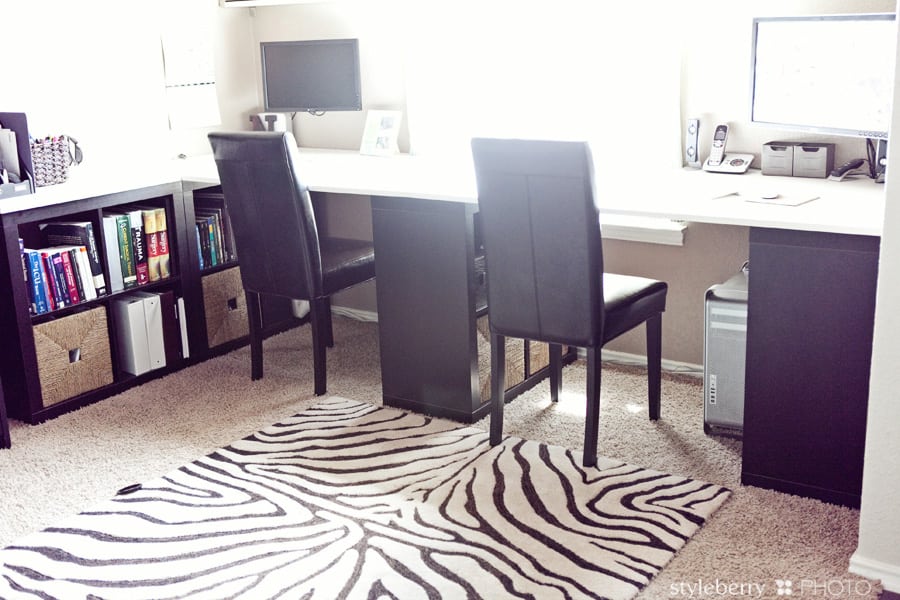
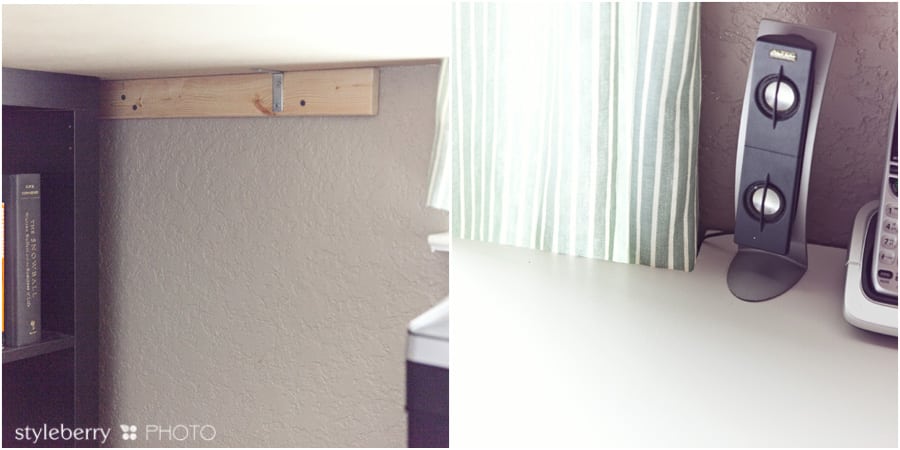
The MDF is supported underneath by some scrap wood we dragged out of the trash cart by the cutting bin at Lowe’s. We secured it into the studs & used L brackets to secure the MDF, so the desk wasn’t sliding all over the place. There is a seam running down the middle of this desk (as the MDF was not quite long enough to run the entire wall) and we used a staple gun underneath to hold the seam together. My dad also helped me notch out room for our curtains to hang & slide back & forth. I know it is hard to see them, but they add a nice vertical line to the space.
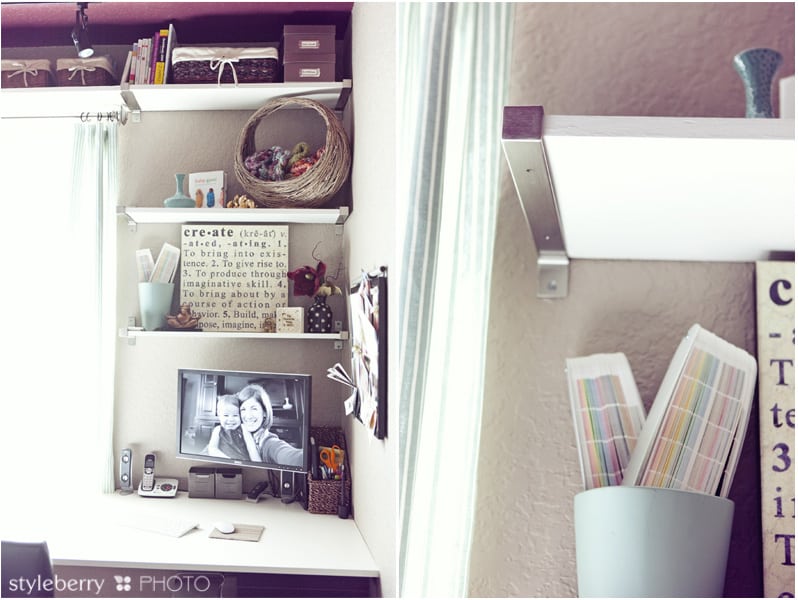
& this is my half of the desk–another Ikea Hack! Again, I love the idea of built-in shelves, but not the expense when I am just going to have to leave them behind. Ikea sells these Ekby Bjarnum brackets (and shelves) but all I bought were the brackets. There is one shelf running the length of the wall on top, above the window, and two shelves that mirror each other on either side. The top two shelves are 11 in deep & the bottom one is 7 in, just so it felt a little less cramped in here. I store all my fabric up above the window in the little baskets & other misc stuff on my side. My hubby’s side has all his personal stuff. & as I’ve said before, he’s a pretty private dude. So mine is what you get to see! ;)
Now here’s the hack: Ikea wants you to spend $15 per board for the shelves that go with the brackets. Well, I wasn’t too fond of the colors/finishes available, or that I’d need at least seven shelves, ouch) so I got to thinking. After a trip to Lowe’s, I ended up buying some basic whiteboard, which ran me $18 for 12 feet of wood (x 2). I had them cut it to size, and was able to get ALL the shelving I needed for under $40, when you factor in the military discount. I took it home, painted it the same color as the desktop, and there were my “built-ins.” A pretty good make-it-work solution while on a budget AND with the ability to re-use in a future space.
So there you have it. My in-progress space. I am currently sewing the linens for the bed so I can move it out of the nursery. I told myself NO NURSERY PROJECTS until this room is working as we need it to. It’s the most pressing since we’ll have company before a baby & I’ll keep the baby in our room for a bit anyway. The order of projects is:
- sew daybed duvet/bedskirt for office
- build barn doors
- hang barn doors
- clear out nursery
- get furniture in there & get a final space plan
- paint nursery
- paint nursery dresser + find a changing table
- sew nursery linens
- meanwhile…transition caroline to a big girl bed
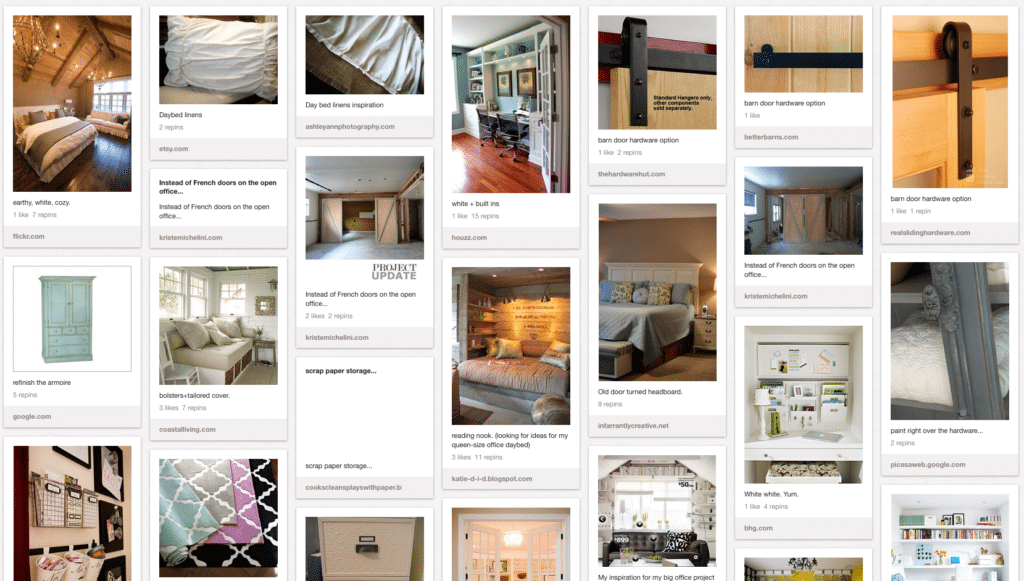
I am tired just thinking about it all. Whew. My commitment to this blog was to share projects as we go (so I don’t forget about them) so I hope you enjoy the process, not just the finished product. I seem to be on the go-go-go these days, without a lot of free time to do much of anything but must-finish projects! Here is a little peek at my inspiration board for the space I shared today! I’m sure you can see where some of the ideas came from. What on earth would I do without pinterest?!
& I only had to break four times to write this. I forgot how much it stinks to have a sick baby. We’ve been so lucky–it’s been at least six months since the last time she was sick. Maybe even longer. It makes me sad! :( Wishing you lots of inspiration & healthy babies!


