Ahh…what a lovely holidays. I hope you enjoyed yours. Ours were quiet and sweet and just exactly what I’d hoped they’d be. But now…it’s a new year. New goals. New ideas. Aaaaand (yippee!) new projects…but only because my parents came to visit! I had a glorious week’s worth of help and was able to knock out more projects in a few days than I have in gosh, what feels like the last six months. Whew. I am recuperating, but with a prettier & more functional house. Hallelujah!
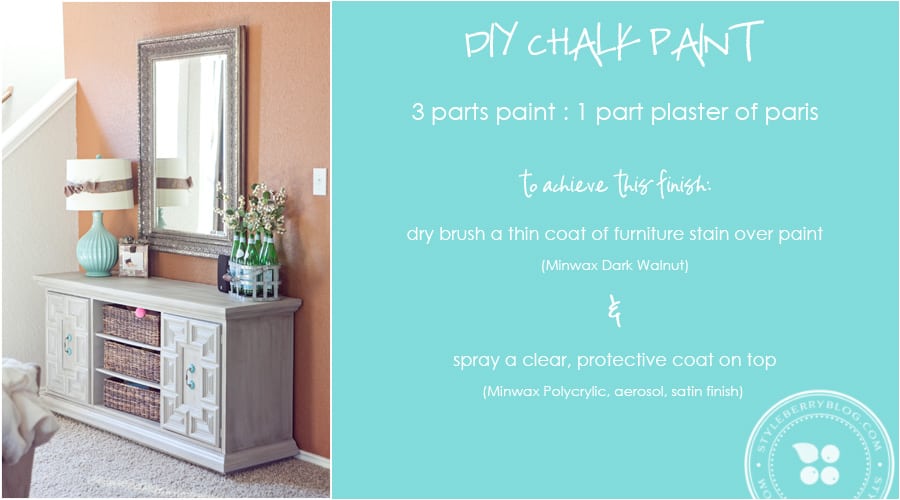
Am I the only one who feels like chalk paint is all the rage right now? Wait. Chalk paint or chalkBOARD paint? Honestly…I cannot find a huge difference. What I do know is that there are two ways to make it: one with grout powder and the other with Plaster of Paris. & I read that you shouldn’t put Plaster of Paris on walls, you should use the grout recipe–so I would support the use of this (see below) version for furniture/stuff only. But not chalkboard walls. At least not until I try it… ;)
I have been smitten with Annie Sloan’s chalk paint & waxes and really wanted to give them a try but at $35 per quart, I was quite hesitant…especially with the limited colors. Add in the wax you have to buy to coat it and the project cost was already up to $50. Now, I have heard WONDERFUL stuff about it, and have heard one quart can cover five pieces of furniture, but there just had to be an easier way, with more local options than the select few Annie Sloan “stockists.” So, of course, I decided to research…& figure out how to make it work on a budget.
I knew I wanted to replace my old table/basket system on my orange living room wall with a credenza/buffet/sideboard-ish piece of furniture because we need some more storage for all those toys. I stalked the heck out of craigslist for quite a while and then this beast of ugliness hit me. It was dark and dingy and nasty. I talked the guy into delivering it to me and when it arrived, it was in even worse shape than I anticipated. With spider eggs and stains and doors and drawers that didn’t work…it was in need of a MAJOR overhaul to get it to even function safely. His “it just needs some varnish” description was WAY off. Oh the joy of craigslist. I talked him down to $50 and well, she was FUGLY. in. all. caps. I don’t understand how a piece of furniture even gets in this shape, but she was a CHALLENGE. I instagrammed the process (I think you’ll see this more, as part of my “not on the computer much” situation) so you can follow along!
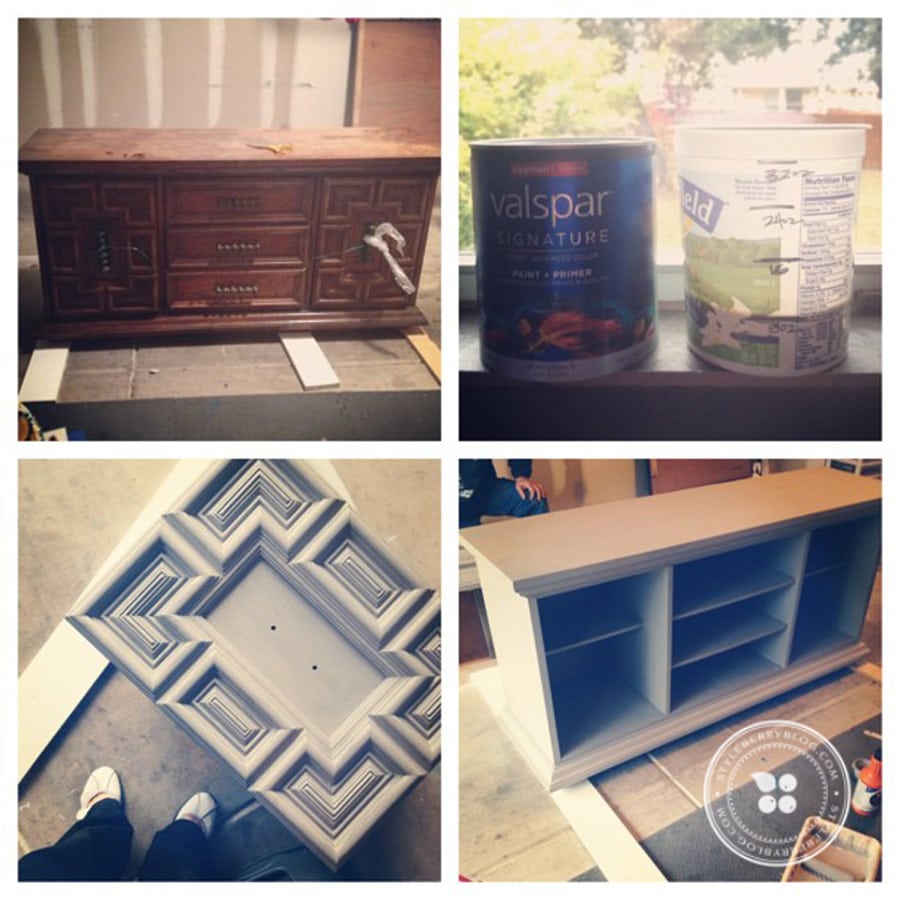
But before we start–why bother with a chalk paint recipe & not just use regular paint? There are a couple of reasons, the biggest: NO PREP. No sanding. No priming. Nothing. Just paint & the surface hardens. The chalky, matte finish allows you to sand it and distress it very easily and quickly after it dries. (If you’ve used latex paint with a sander, you know it will likely peel when sanded.) I used this blog post to educate myself about the different recipes for chalk paint and decided to go the Plaster of Paris route. I mixed my own paint (just a quart of latex, eggshell, from Lowe’s) with the PofP and it worked beautifully. But I learned a few things along the way. So here it goes…
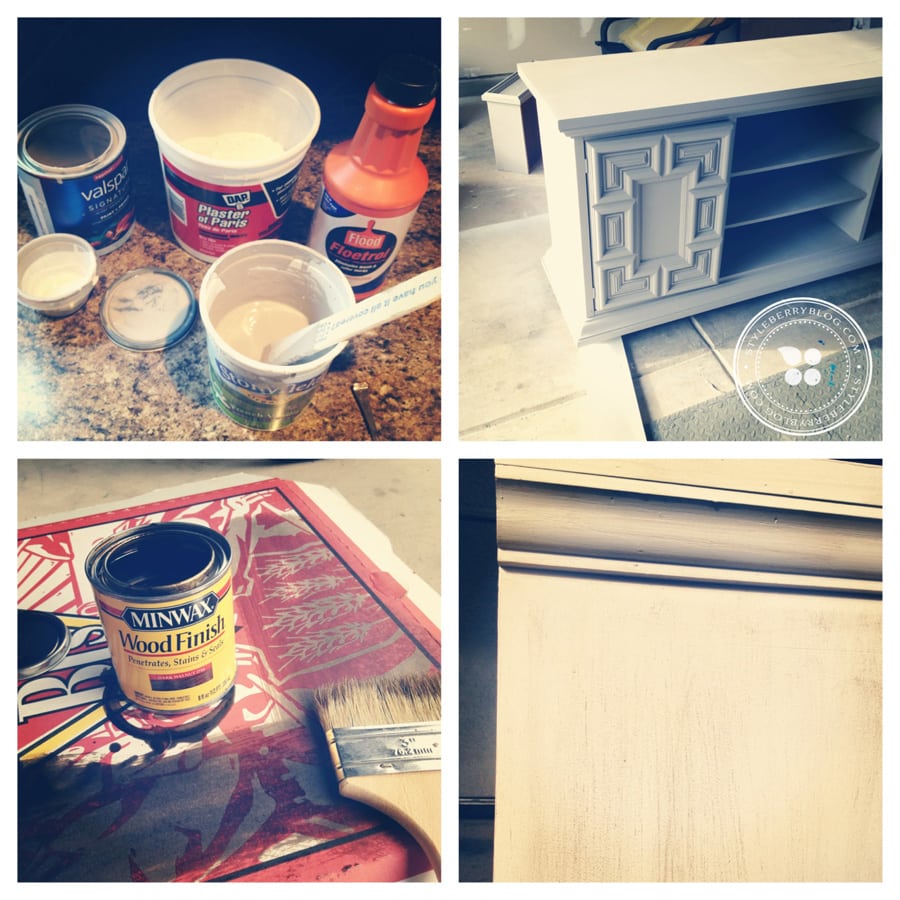
SUPPLIES NEEDED:
- Quart of Paint (Lowe’s, Latex Eggshell–this was color matched to Ben Moore’s Winter Gates AC-30)
- Plaster of Paris (I got mine at Michaels, a small container & used a 40% off coupon–it was under $5)
- Floetrol (I had it, but this makes the consistency of the paint smoother & less pudding-ish–a must, IMO)
- Wood Stain (Minwax Dark Walnut used here)
- Spray Lacquer (Minwax Polycrylic, satin)
HELPFUL HINTS
- use a disposable container to mix the paint, but before you mix the plaster in, be sure to mix it well with water so it is smooth and NOT lumpy. It will harden fast if you don’t mix it with paint, so mix well, get it smooth (milk like consistency) and then dump in at a 3:1 ratio [paint] : [plaster of paris+water mixture]. It does not need to be a perfect measurement, but the color may be altered if you are off on your proportions on a subsequent remix.
- Knock out the painting in a couple of hours. This stuff will get lumpy overnight and will not be good the next day. It dries very fast and hardens nicely, but so does the mixture of paint.
- If you plan to use wood stain to age it, work with a VERY dry brush. The chalky finish will rapidly absorb stain and you cannot wipe it off. I used stain vs. distressing because I did not like the color of the wood underneath. It was too dark to produce the grayed finish I was looking for.
- If you use wood stain, wax will not work. I planned to wax it with a rub-on wax and as soon as I started rubbing it on, my wood stain was getting muddy and the brush strokes (that I wanted to see) were going away, resulting in a very bland finish. I bet wax would be fine if you were just covering paint, but it did not work on this piece. I used the spray, and it is full of fumes. Use it wisely & absolutely ventilate. & Plan to air out the piece for a couple of days.
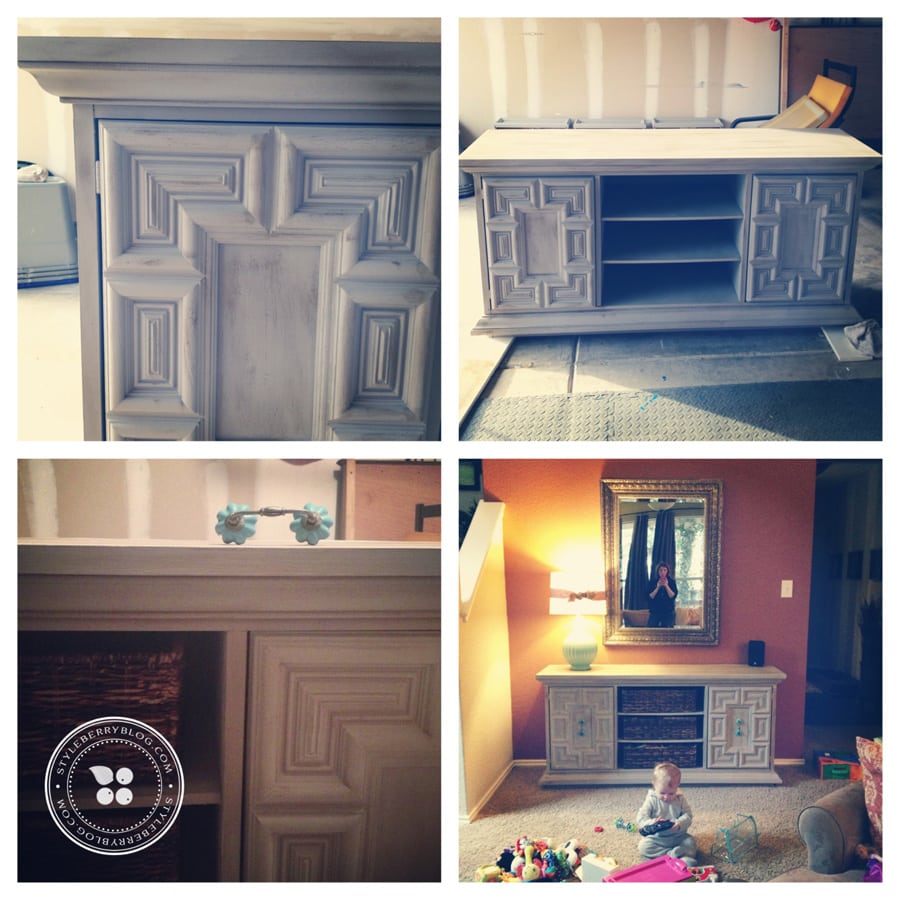
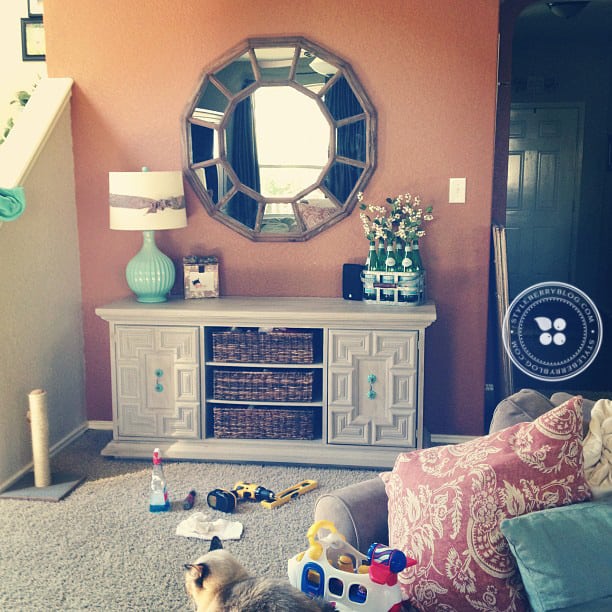
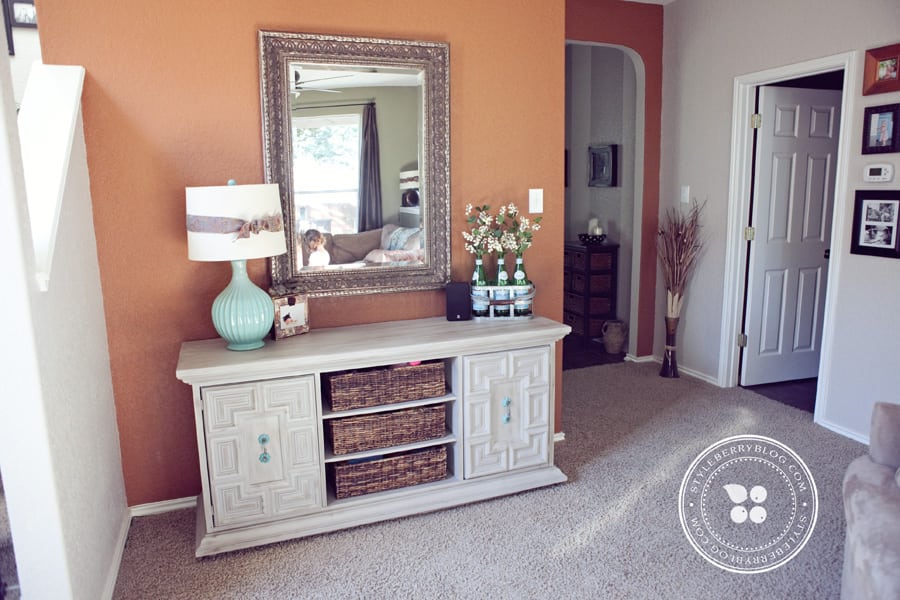
& I decided, for this phase of life, that the drawers would best be replaced with baskets. I didn’t need a baby pulling a drawer out on his head and I wanted this to be kid friendly. So this is my new storage beast! Complete with some pretty Anthro hardware. I did refinish the drawers and they are happily living in my attic for the next phase of storage needs! :)
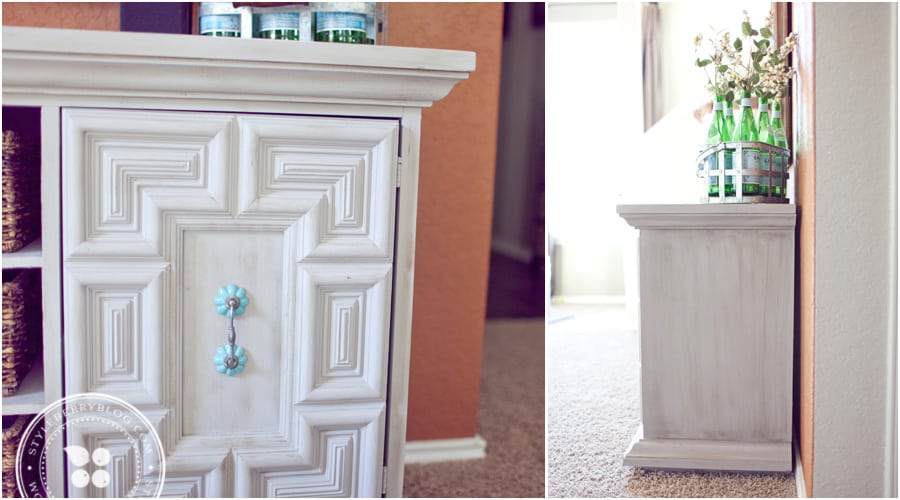
The top of this piece was my biggest challenge. It was not solid wood, it was a wood veneer and something had spilled on it. I ended up having to prime the top only, with four coats of KILZ primer to get the oil from leaking through the paint. It also had a couple of raised, cracked areas. Instead of deciding the piece was too damaged to use, I worked the flaws into the aging on top and ran the brush right over the crack, making it part of the character.
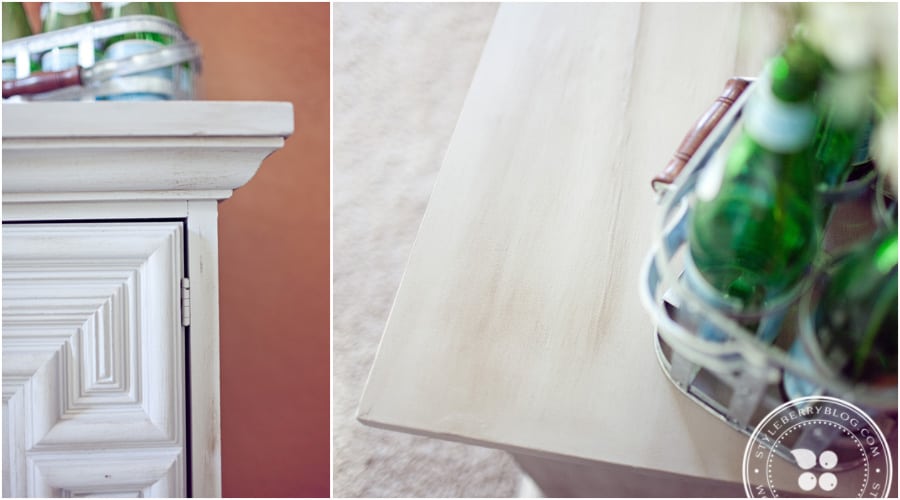
My #1 goal was cheap & functional and this did the trick! I am guessing that my initial investment for DIY chalk paint was just slightly under what it would have cost to use Annie Sloan, but being able to use the exact color I wanted (and not have to buy two $35 quarts and mix) made it worth it. & now, I have all of the supplies to easily make this whenever I want to, even for small things with the little $2 testers you can buy at the paint counter. Chalk paint will adhere to ANY surface (so they say) so the possibilities are endless!
& now that this wall is all put together I realized that the mirror-I-intended-to-repaint-five-years-ago is just the wrong shape. I am on the hunt for the perfect giant round mirror because I think it would be a much better mix of shapes. Too many rectangles right now…
& while it looks pretty every night…
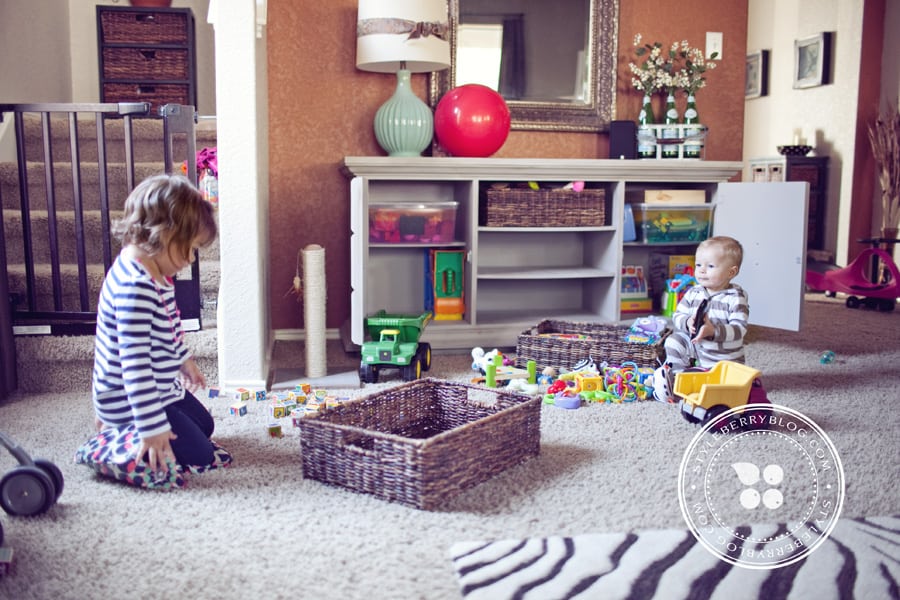
…all day every day looks it like this. Toys are for playing, not hiding after all.
Have you had experience with chalk paint? Annie Sloan? What have you learned?! :)
Happy Painting!*
(*this stuff is really addictive…you’ve been warned!)
1.16.13 update: another Homegoods gem. See? Round is soooo much better!
