I haven’t yet decided if nurseries are actually for the baby. I kind of think they are mostly for the mama. She saw four walls and had a vision. A vision full of hopes and little moments, of snuggles and kisses. This is the place where her dreams come true…the dream of becoming a mother.
The first time I got to plan a nursery I planned two. See, we are the rare few parents left that love having a “surprise,” but this means that there has to be some grace given when it comes to completing the nursery decor. Since I knew I would not have the same time to finish the space as I did with just one child, I planned this room as a gender neutral space, and left the details for after delivery. This way I could customize the room in either direction. It’s definitely less masculine than it would be had I known I was having a boy, but the truth is, we’re moving in less than two years. He’ll be transitioning to a big boy bed at that time & most of the boy details are going to translate to the “big boy room” I have in my head, full of oranges and greens and navy. But this room is about NOW. I spent every night for his first six months rocking him in the chair in this nursery, staring at the details that I adore so much. And I am so glad I invested the time in to this space. I love it. By the time he’s old enough to have an opinion, he can help me create a room of his own. But right now, this is the perfect place to love on my sweet baby boy.
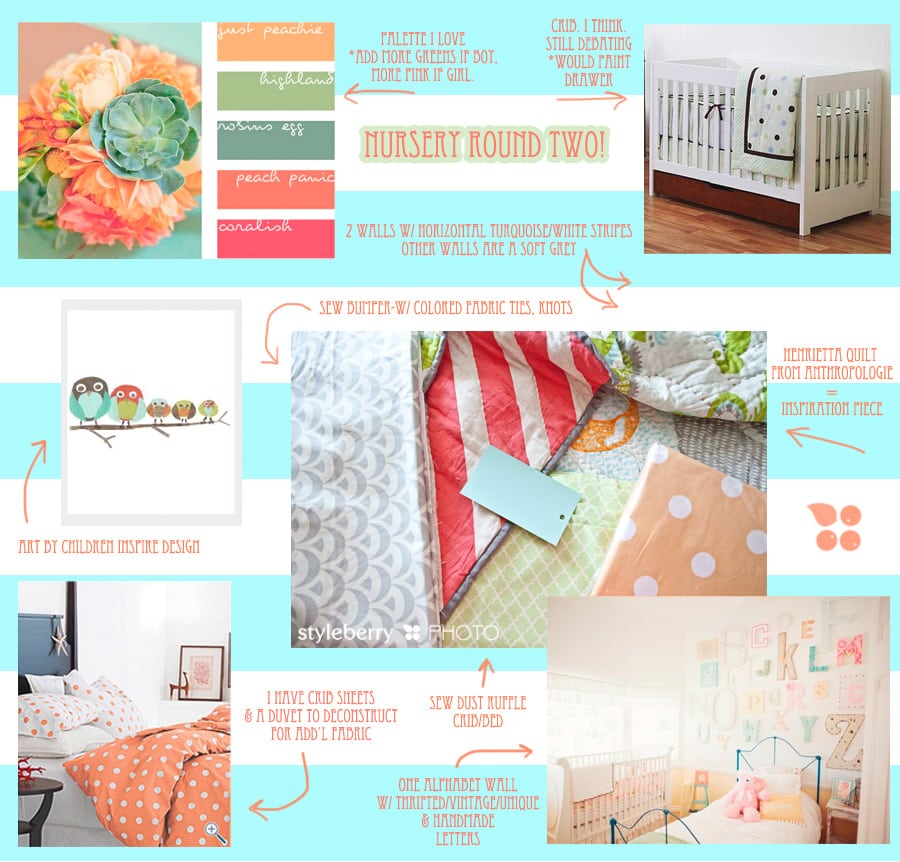
I am not a buy a bedroom in a bag kind of gal. I want rooms that look like none other on the planet, with pieces collected along the way, often irreplaceable and unique to our home. This room was no exception. The very first piece that I found to inspire this room & the color palette here was the quilt. It set the tone for everything. I originally intended to have a bed in here, but I later changed my mind, when I figured out a way to make it work in our guest room/office space. So orange, turquoise, lime, white, grey and pops of bright red were where I was headed. Here’s my mood board (created before we knew “it” was a boy!):
Now, some of my plans have changed (as all good designs do) and I just love how it is coming along. I am sure we’ll be making little adjustments here & there, but for now, welcome to Everett’s Dreamy Nursery. All resources linked throughout the post. Feel free to comment with any additional questions…enjoy the eye candy!
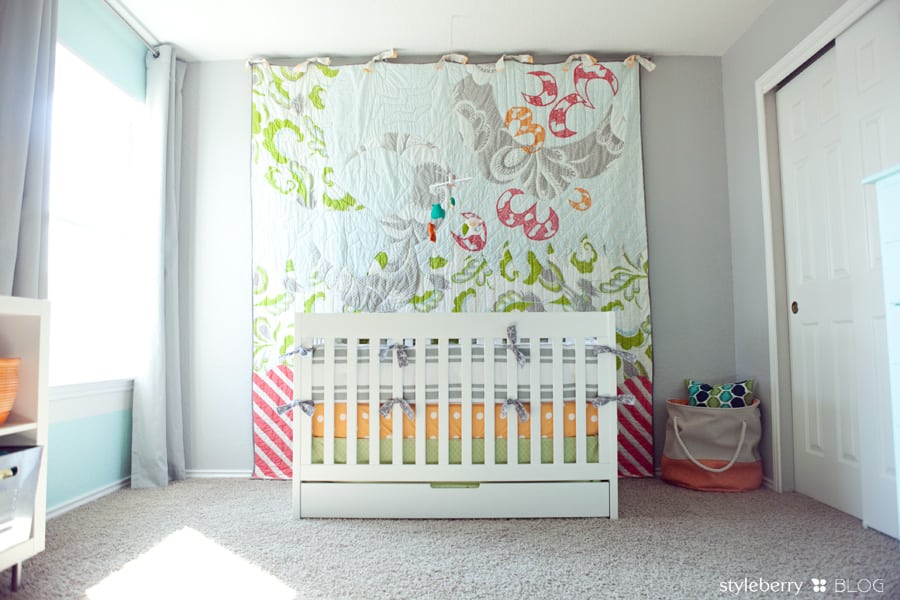
- CRIB: BabyMod Park Lane (I painted the bottom drawer a high gloss white)
- BUMPER: PBK Harper Collection in Gray
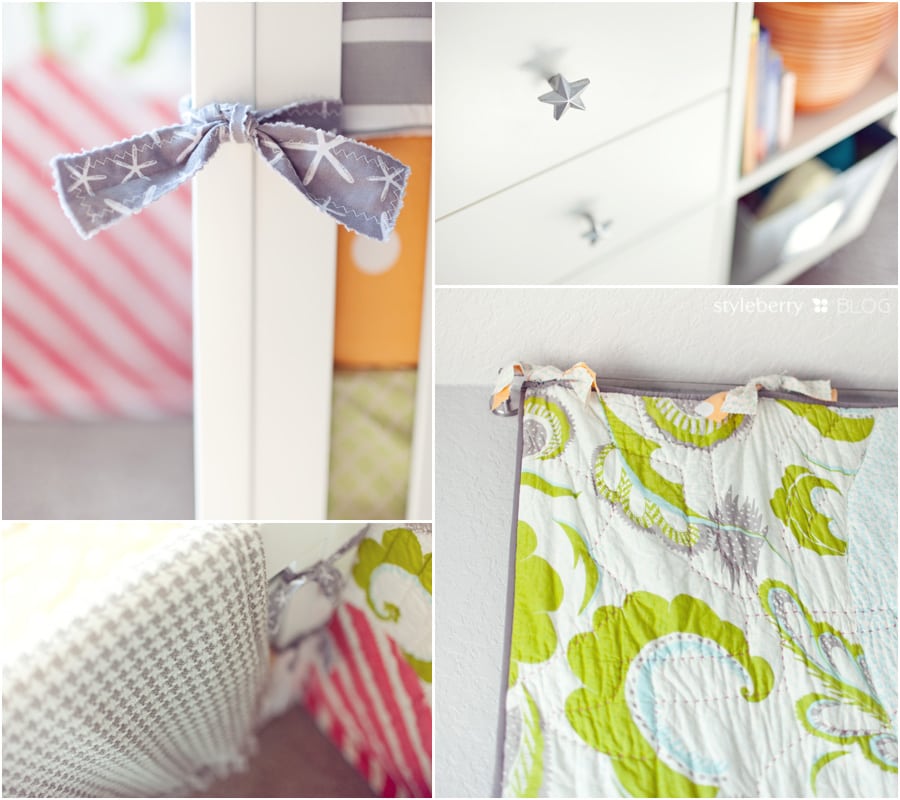
- BUMPER TIES: DIY, fabric: Michael Moore’s Going Coastal Sea Star Gray (the PBK ties are too short to fit on this crib, and were unsafe, so I replaced them)
- CRIB SHEET: Garnet Hill Dot to Dot Percale (circa 2010, color: Apricot–these were purchased on a whim, just in case!)
- DUST RUFFLE: DIY, fabric from Hobby Lobby
- QUILT: Fred Shand for Anthropologie, The Henrietta (I sewed the ties on top)
- CURTAINS: Gray Grommet Top, Target (I added blackout fabric)
- CANVAS TOTE: Homegoods
- PILLOW: Pottery Barn Teen, Outlet
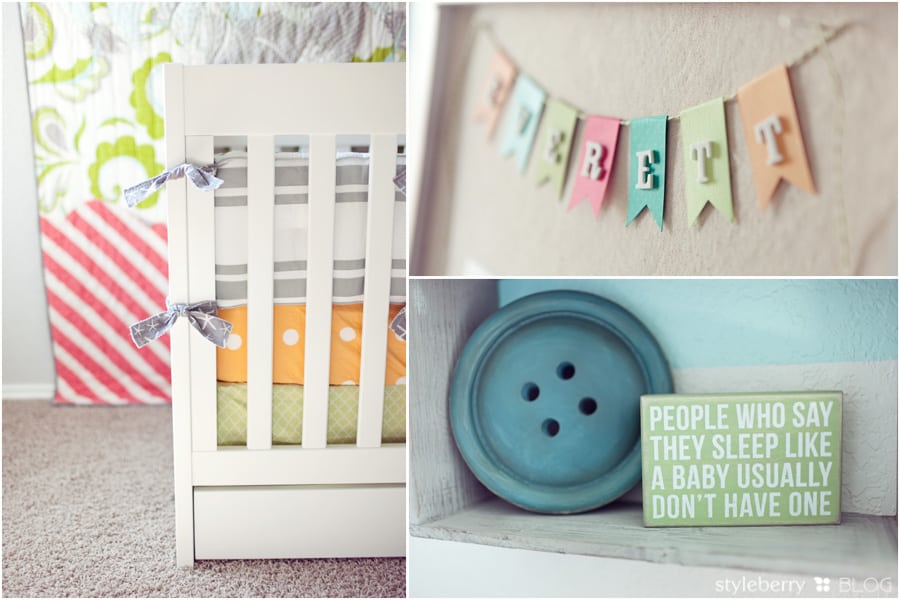
- NAME PENNANT: DIY here
- GIANT BUTTON: Hobby Lobby
- SLEEP LIKE A BABY SIGN: TJ Maxx
- STAR KNOBS: Hobby Lobby (spray painted with rustoleum in stainless steel)
- HOUNDSTOOTH THROW: Homegoods
- QUILT HANGER: Ikea Dignetet Curtain Wire, (with four brackets total)
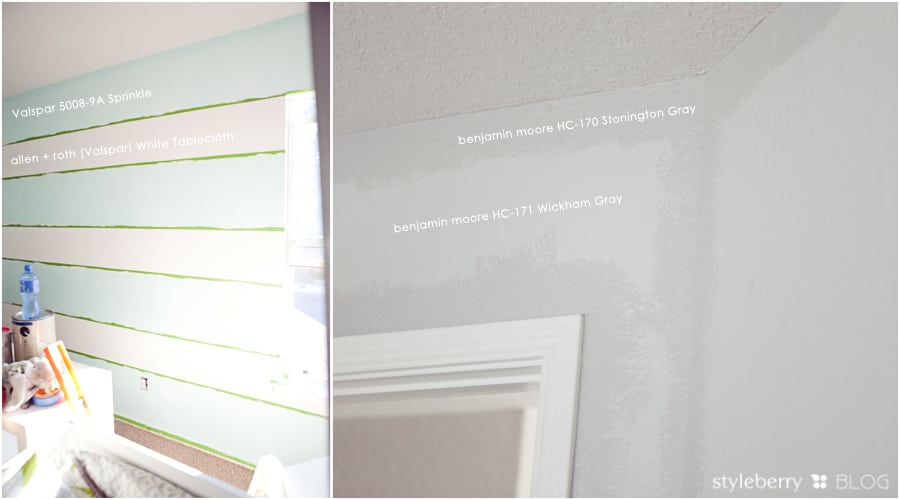
Oh, the painting. I love painting. Sometimes. [ha!] We (my dad and I) painted this room beige the first time. Then a chocolately orange when I got bored. Then (four years later) we painted it what I thought was the perfect gray….only to hate it as soon as we (and by we, I mean he) got two coats on. I looked and looked and the first gray, Wickham Gray, was just too blue. What if it was a girl? It was just not right. [sorry Dad!!] Back to the paint store we went again. Stonington Gray was the PERFECT shade. Whew!
I planned out the stripes based on the top and bottom color–I knew I wanted both to be turquoise. So I needed an odd number of stripes. I wanted them at least 12 in wide, so I did the math & started marking. (we had already painted the wall white.) I used a level to mark the lines in pencil on the wall first, then ran a line of Frog Tape along my mark. Don’t bother with the blue tape. The green is a far superior option! After I had the tape up and rubbed it on well, but instead of doing my perfectly straight line trick like usual, I brushed a stroke of white over the tape line (in the section where the turquoise would go), sealing the tape to the wall. After it dried, I painted the Turquoise, Valspar’s Sprinkle, over top. It took two coats to cover the white. It is the perfect shade of not too minty, not too blue turquoise. & trust me, I tried out a TON. Like, at least a dozen. The perfect turquoise is really hard to find.
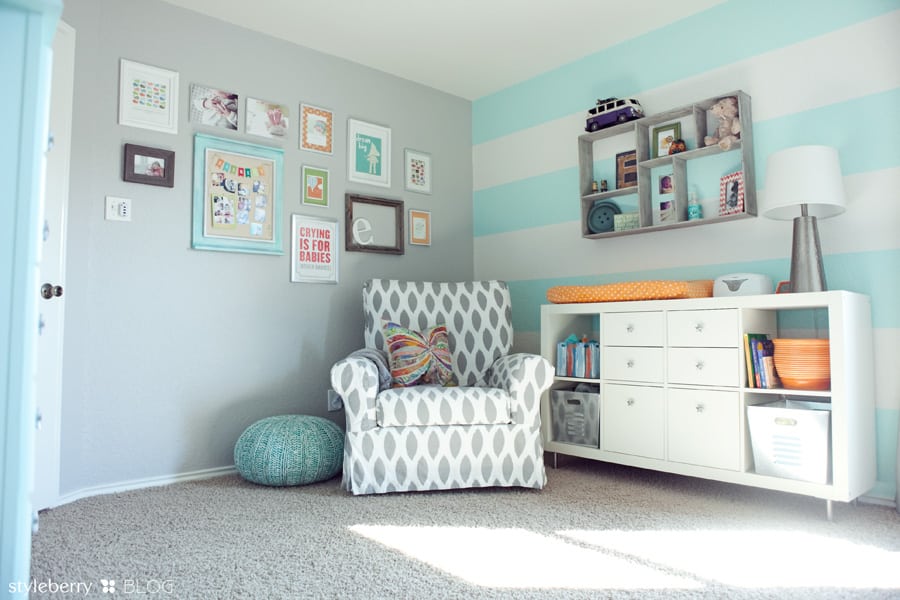 DRESSER: Ikea Expedit, on its side + feet (found in store) + (2) two drawer inserts + (2) one drawer inserts (found in store)
- GALVANIZED STEEL TUBS: Lowe’s
- ORANGE POT: Homegoods
- STRIPEY BIN: Anthropologie
- CHANGING PAD COVER: DIY (using this tutorial), fabric from Hobby Lobby
- LAMP: Homegoods
- WALL SHELF: Homegoods
- CHAIR: PB Kids Comfort Grand Swivel Glider (scored for a mere $200 at the outlet, un-upholstered) + DIY slipcover (oommmmgg) fabric: Premier Prints Chipper Twill Storm
- THROW PILLOW: Homegoods
- VARIEGATED KNIT POUF: Land of Nod (it usually sits in front of the rocker…my feet don’t touch the ground without it! It’s necessary!!)
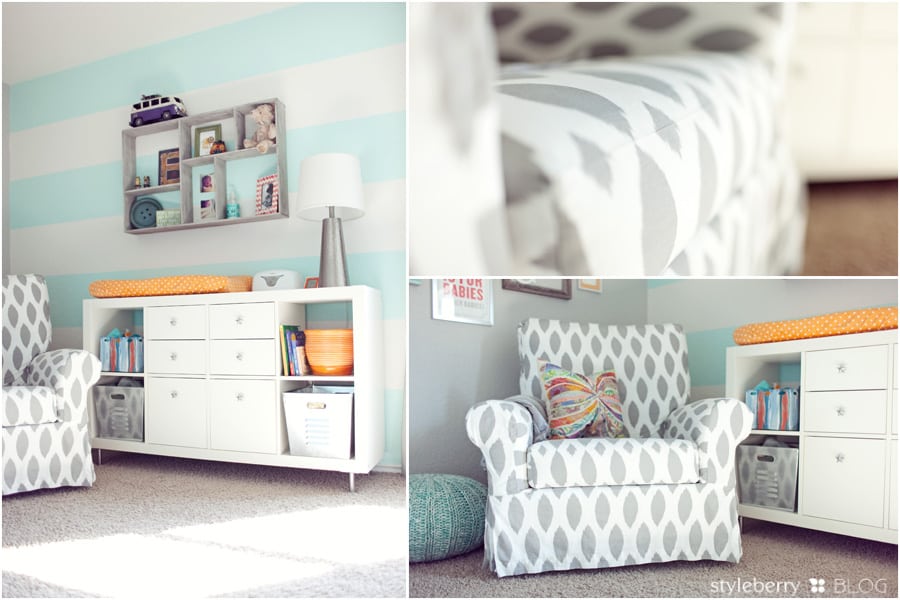
& for the record, I finished sewing the slipcover for that chair exactly five hours before I birthed a baby. WHEW. :)
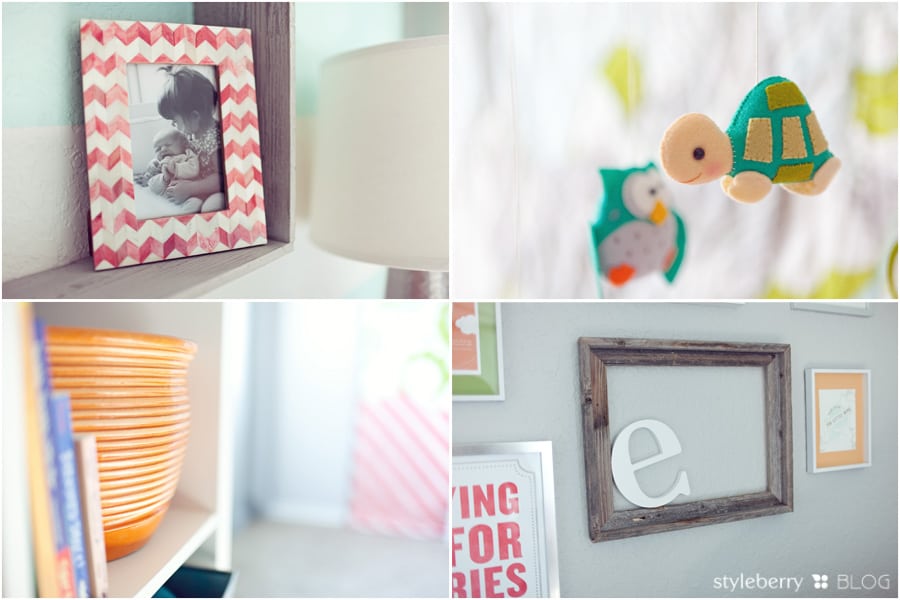
- CHEVRON FRAME: Anthropologie (image by Kate L Photography)
- MOBILE: Amazing custom piece by Gifts Define. See more of it here.
- DRAGONFLY ART: Piggies and Paws (these were his 2 weeks old feet! His hands are on the other side of the room)
- OWL: Hobby Lobby
- CHEVRON POT: Ross

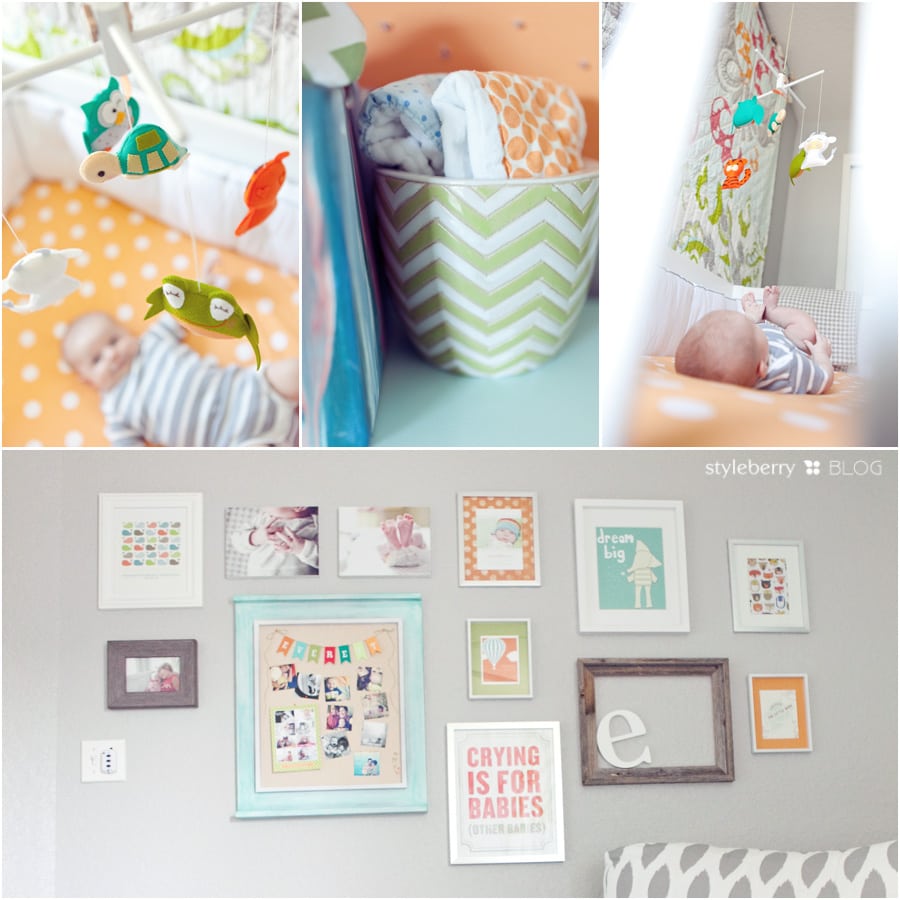
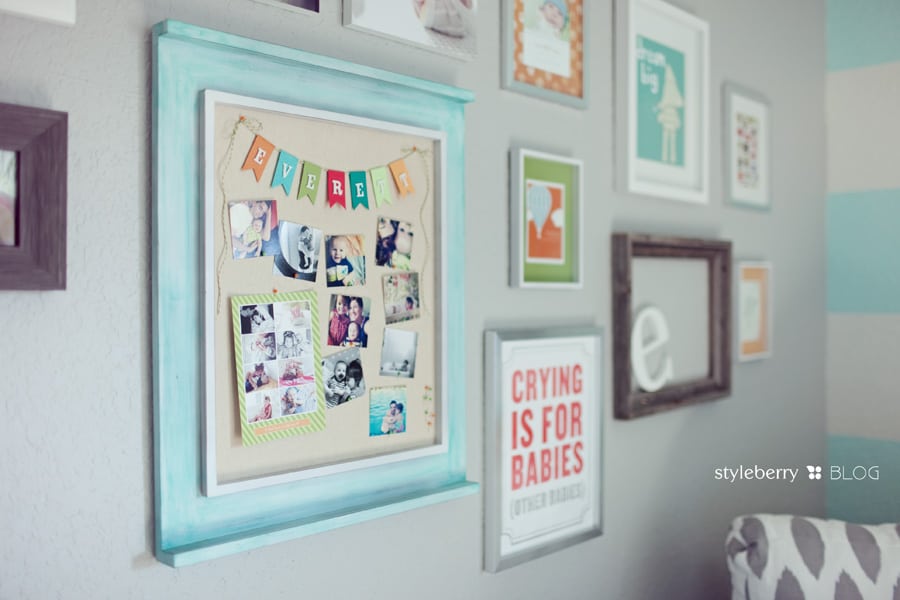
Ahhh. My favorite wall in the room! Too bad my back is usually to it. I originally intended for this to be an alphabet wall, but after I got the room together I decided it would be too much. AND there was no place for pictures in this room if I did just letters, so I decided to make this an eclectic treasury of goodies. All of the frames are either from Homegoods or Target. I’ll source it all from left to right, top to bottom:
- CUSTOM WHALE PRINT: Tree Top Studio
- (2) STANDOUT MOUNTS: WHCC, of my work
- BIRTH ANNOUNCEMENT: my work & design
- DREAM BIG: Barking Bird Art
- WRAPPING PAPER: World Market
- PRINT: WHCC, my work
- LINEN PINBOARD: Homegoods, I color-washed it turquoise & it’s full of Instagrams. More on it here.
- BALLOON PRINT: Card, World Market
- CRYING IS FOR BABIES (letterpress): Sycamore Street Press
- WOOD FRAME: Hobby Lobby, “e”: Pottery Barn Outlet (I bought a standout print for in the frame and had that random “e” lying around since our girl name started with “e” too, and threw it up there to hold the place…but it has actually become one of my very favorite things on that wall!)
- THANK HEAVEN FOR LITTLE BOYS PRINT: BlissFolio
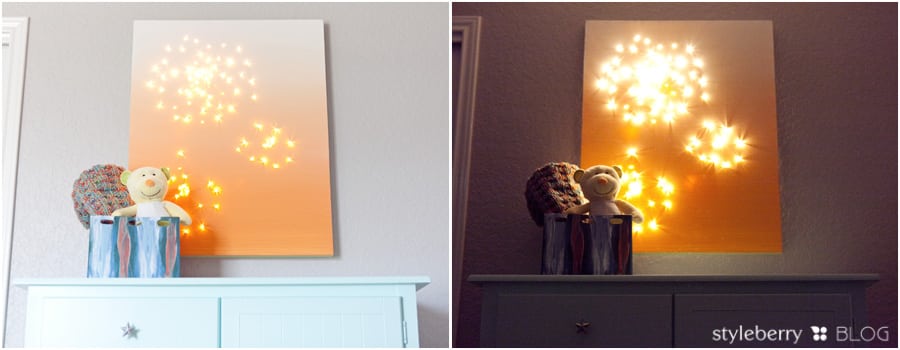
& finally, my DIY Night Light that casts the most beautiful glow on this room at night. Lord only knows how many hours I have spent staring at it. Good thing I love it so much. Full Night Light Canvas DIY here. The dresser (an old piece from college with at least three layers of paint underneath) is painted the same as the stripes, Valspar Sprinkle.
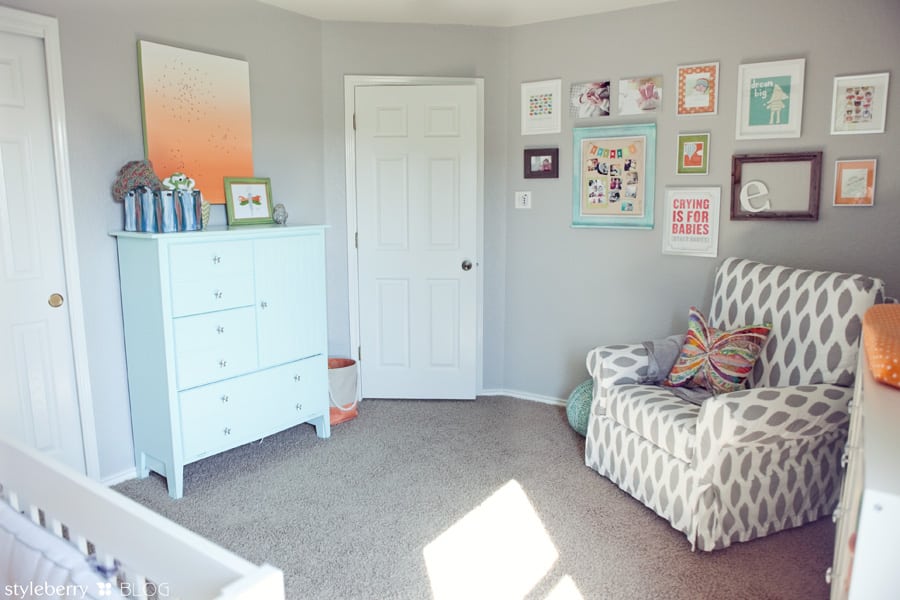
It makes me sad that this will be my very last nursery to decorate, but I am also very excited about the room evolutions that will take place as my babies grow up. I had so much fun doing this nursery and caroline’s over the top girly nursery and I just know that I will be so sad to leave this house! Both rooms are so different and so fun in their own way. Both such lovely places to spend so much time in. BUT…I am sure I will be ready to redecorate when we move! If I missed anything, let me know and I’ll answer in the comments section! :)
For more inspiration & to see what design direction I’m heading in next, check out my pinterest boards!

