Dare I say the 2nd trimester energy has arrived? I’m on day two of staying up past 10pm. Might have something to do with my girl sleeping until 9am in the morning (this kind of growth spurt I can get used to!!) but either way, I’ll take it! I’ve finally found some time to get back to some fun DIY stuff here, so I hope this project is one you all can enjoy–especially those of you non-sewers. ;)
I have figured out how to sew over the years. I’m not great at it. I can get by. But I really LOATHE it. I’ll find any other way to construct something other than sew…and this project…well…it’s exactly what happened when I decided to leave my sewing machine in the cabinet & use the hot glue gun instead. ;) Which means–ANY of you can do it. If you can plug in a hot glue gun. SWEAR.
Buntings are all the rage right now. They are on cakes, blogs, t-shirts, party tables. You name it. Someone’s put a bunting on it. A what?! A bunting. You know, a string of flags. If you were a swimmer like me, just picture the flags you use to measure the length between you & the wall when you were doing backstroke. But cuter. & not plastic. In the crafty world, THOSE are buntings. Anyway, I’ve always wanted to make one. But I’ll tell you, there is no way I am going to sew two pieces of fabric together, (thirty times) turn them inside out, sew to a string and blah blah blah. Too much work. Not for me. How about glue? Sounds better. Caroline got a cute one for her birthday a few weeks ago–no thread in sight. Here’s how!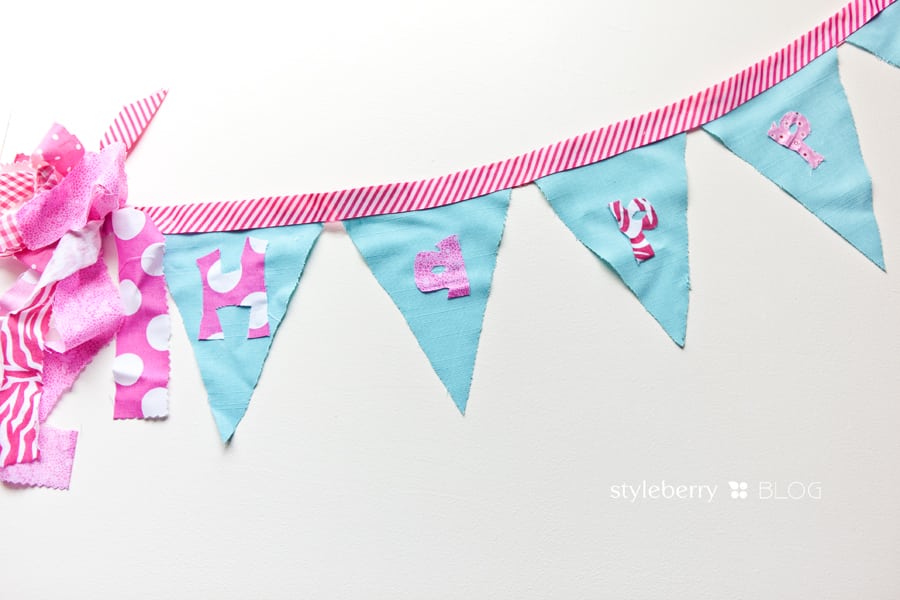
WHAT YOU NEED:
- fabric for flags. any will do. (This is a linen blend I got for 90% off when a fabric store was closing & tucked away for the perfect project–but you could use mismatched scraps, burlap, ANYTHING!)
- letters/numbers–fabric or stencils or iron on stickers. You can be creative. (I free-handed my letters with a scissors using a few different fabrics–1/8 of a yard of each, cost well under $3) But really–you don’t even need to put anything on them if you don’t want to.
- ribbon, or something to attach the flags to. Mine was 1 1/2 inches thick & it was perfect.
- scissors or pinking shears
- template for a flag. I cut mine out of a box from the recycle bin. It was 5″ wide by 6″ long to the peak.
- hot glue gun
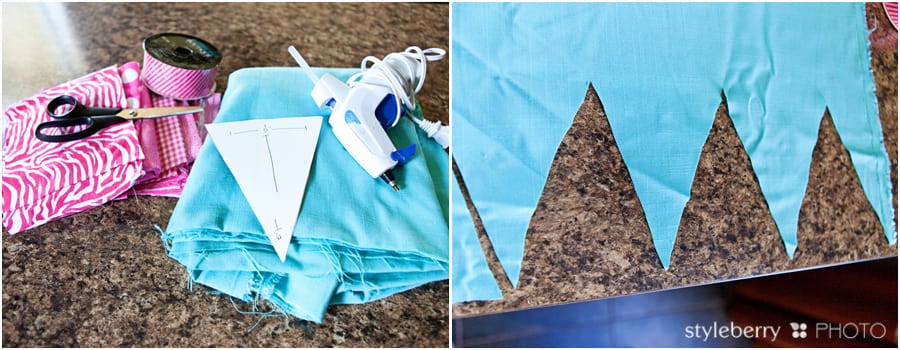
I used the template to cut the flags out of my fabric. I was decently careful they were kind of straight. But the unevenness adds charm. ;) I think.
Once the flags were cut, I used my extra sharp scissors to free-hand letters out of the fabrics I chose at Hobby Lobby. I literally did this the night before her birthday breakfast, so I had my mom here to help. I cut the letters, placed them on the flags & she glued them with a few dots of hot glue.
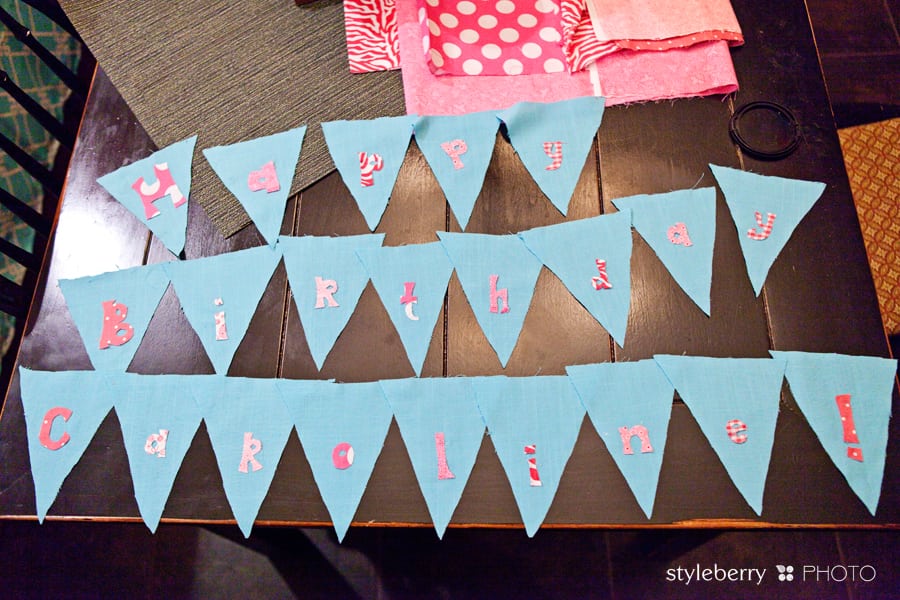
then we were ready to attach! I used thick ribbon & just to make things easier on myself, I used my flat iron (yeeeees the one for my hair–I use it to “iron” all the time!) to crease the ribbon in half.
I knotted the starting end, leaving a few inches to spare at the ends. I then glued the flags, two at a time to the ribbon, then glued the top flap of the ribbon down to the flag & held it for a second to set.
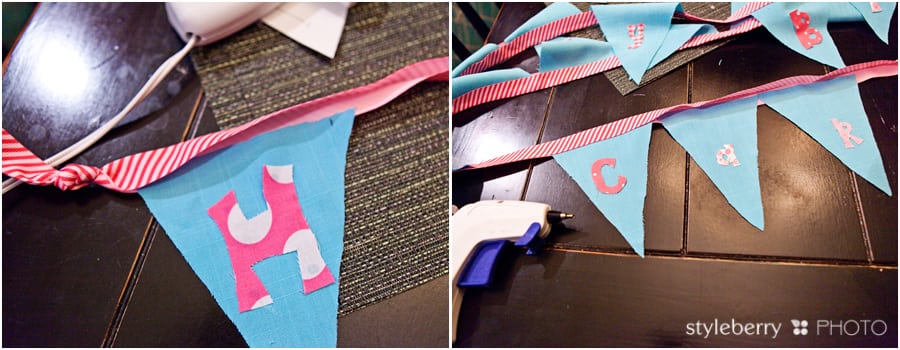
I kept going until all the flags were in place, leaving a little space between the words.
Then to finish it off (& stick with my messy but cute style) I cut a few strips of the fabric I used for the letters with a pinking shears & knotted on the ends. I used one of the scraps to tie to my curtain rod.
&…I just love how it turned out!!!
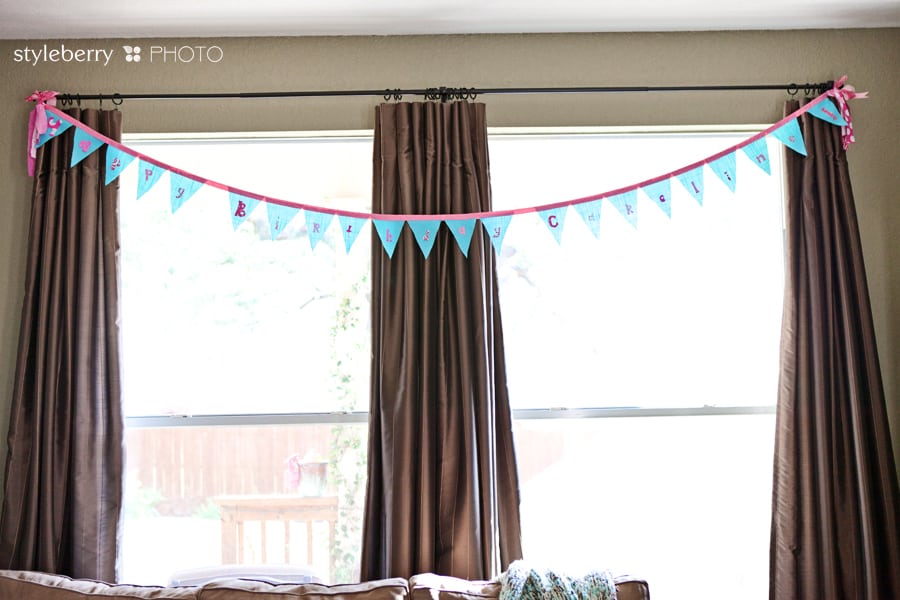
So of course now my head is spinning…I can make one out of burlap for Halloween…one as an advent calendar for Christmas…the possibilities are ENDLESS!!! & all…without my stupid sewing machine! AND for well under $10. Maybe even under $5.
You so can do this. In a kids room. With fun & funky fabrics. Teeny for a birthday cake. & if you really just can’t…or NEED it to be beautifully sewn…well, ask Julie. She might make you one. If you are extra sweet :)

