I’ve made a pact with myself that I am not going to start another blog post with an apology for the lack of a prior blog post. There is nothing to apologize for. I am still creating at about the same pace as I used to, I just choose to keep creating, instead of stopping to blog about it. I still haven’t figured out how to do it all and I have thoroughly embraced this season for what it is. The end of having my kids both home all day is way too close for my comfort and there is so much to be said for living this life, not talking about living life through a screen. Which brings me to my four month old project…that I love… :)
I’m in the thick of preparing my home for the market. (side note: should you, or someone you know, be looking for a home in San Antonio in June, mine will be turn-key ready!!) Staging my very personalized home is at the forefront of my mind. Given my own background in home staging, you’d think it’d be easy. But it’s still a struggle when it is your own space. That you love. With your babies faces smiling at you from every wall. :) I digress. But I do love pictures and they are all over!! I think the rule of thumb is, if they look like they belong in a magazine, leave them. If not, depersonalize, depersonalize, depersonalize. That being said, I am lightening and brightening everything. I am neutralizing. I am de-wrought-iron-ing (is that a word??) Regardless, early 2000’s wrought iron be gone. It’s not my style anymore and my bedroom (my, first furniture we ever purchased together, bedroom) needed a serious facelift. You may remember my old bedroom back when I talked about how to place a rug under a bed. Well, I physically could not look at the bed anymore. If I was doing it all over again, I’d NEVER buy a 5pc bedroom set. Never. The old me was matchy matchy. That was ten years ago. These days, the more imperfect, the more beautiful. But this darn furniture is so solid & such good quality that I just don’t have the heart to ditch it. Well, nor do I have the budget to replace it.
So I had to get creative.
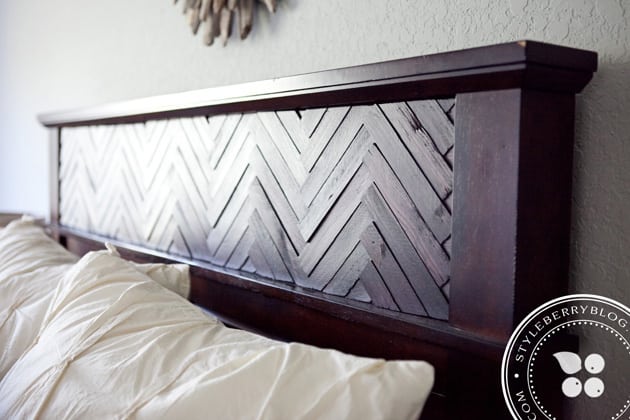
I tossed around a ton of ideas as to how to cover up the space that was left empty after I removed the wrought iron (see 2nd picture below) & after consulting with my best design-y friends (thanks, Beth!!) trying a fabric covered panel, a wood panel, even a blank space, my bestie Nicole got my creative juices flowing. I have to give her credit. This was all her idea. I just executed. & gosh, I love it so much I kind of want to do a lighter, rustic, horizontal striped version for everett over an entire headboard! It was so easy. & so cheap. Here’s the scoop.
MATERIALS:
- 6- 12 packs of wood shims (that were $1.50/ea!)
- wood stain
- wood glue
- mounting whiteboard
- spray wax
- wood screws
- hand saw
- circular saw
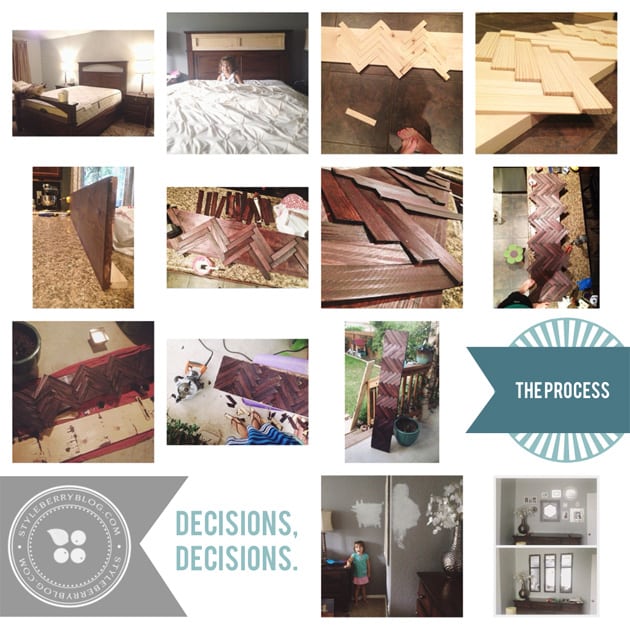
HOW I DID IT:
- First, I measured the board to fit in the space. The precut wood was just shy of being tall enough to cover the open space, but perfect after I mounted in on another board. This made it nice & sturdy for mounting, too.
- Second, I laid the wood shims out in the pattern I wanted. Shims are thicker on one side than the other and have the most beautiful texture! Some pieces were broken or just poor quality, so I bought two extra packs to account for the duds. These are only meant to be functional, not pretty, so I had to be selective!
- Once I figured out how many I needed, I started to stain. I grouped them into thirds. Each set getting one, two or three coats of stain, so I could get a nice variation in color. I also stained the board I was mounting on, since I knew parts of it would show through.
- After the shims were stained, I laid them out and began securing them after I made sure they were perfectly centered and lined up top to bottom. The hardest part, for sure! I used a foam brush to paint on the glue, only because my bottle was plugged from the last time I used it!
- Once I got down to the little tiny corners, I used a hand saw to cut some smaller pieces to fit in. I tried to cut the shims with a shears, but they cracked. A little handsaw goes a long way. I did not cover the tiniest portion of the board. You can’t tell at all.
- Once the board was completely covered in my herringbone pattern, I watched a few youtube videos to finally conquer my fear of the circular saw. I knew this project wasn’t going to get done if I didn’t just do it myself, so it was time to learn! & I did it. In a dress, nonetheless. ;)
- Once it was trimmed, I applied a couple of coats of spray wax, let it air out for a good week, and then mounted it to the bed frame with my wood screws and I was done! (almost)
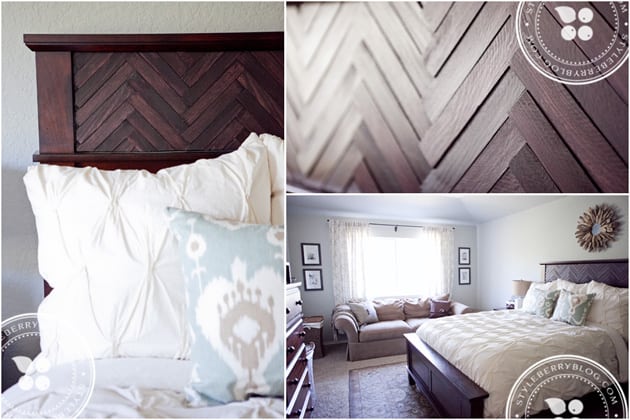
Part of my decision to keep this bed this color (I almost went crazy and painted all my furniture…thank goodness I didn’t) was how pretty the insert came out. I loved the texture & color variation that was missing from before. & who doesn’t love crisp, neutral bedding next to some pretty wood?!
The last step of this transformation was chopping off the foot board. I have this thing for foot boards. It’s my ultimate pet peeve to have bedding falling off the end of the bed & seeing as we only need a quilt a couple months out of the year, that duvet is mostly for decor. & I do love it, so it must stay. A foot board is a necessity. But, I wanted it to be a lower profile and I was SO surprised how hacking a foot off changed the entire feel of the room. It opened it up SO much! It complimented the bedding and diverted your eye. It drew you right to the headboard. I’m thrilled!
Now we have that darn couch that I refuse to get rid of because I know we’ll have the right place for it in our next home. For now, it lives there, but when we show the home, it will go into storage.
I made over this room on a major budget. I ended up getting a store credit for a massive Homegoods rug that fell apart and decided to do this whole thing using that gift card. Thus, beyond wood and paint, I was limiting myself to ONLY Homegoods for accents. I managed to grab the ikat pillows, sunburst mirror, six curtain panels (!!), lamps and new mirrors over the dresser for the value of the card. Score!!
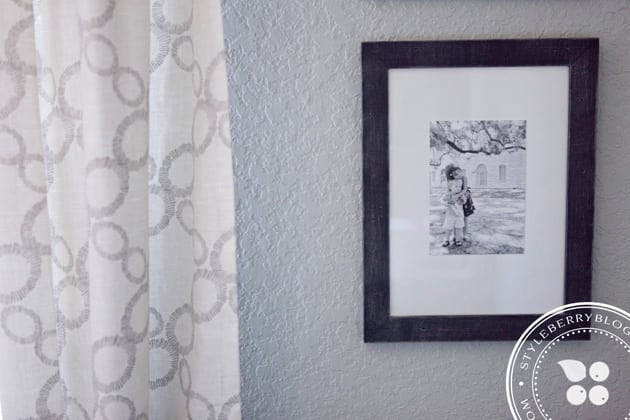
I changed my “accent walls” (from this art, seen here) and framed out the window with a few mismatched frames I got several years ago for $6 on clearance at target. They were a fun size, but all different colors, so I greywashed them & put 5x7s in them. This one is actually an instagram that I blew up!
I replaced my “factory” dresser mirror a long time ago (you can see the “before” above in the IG images!) but after I painted, I needed something with more contrast since the paint was lighter. I found these amazing old “windows” turned mirrors at Homegoods, and there happened to be three, which was perfect! Eventually I want to replace the vase with sometthing made of reclaimed wood and some natural flowers. I’ll also replace the hardware on the dressers with some rustic pulls. I plan to remove the bottom drawer from each nightstand and replace it with a basket, to add some more visual appeal, too.
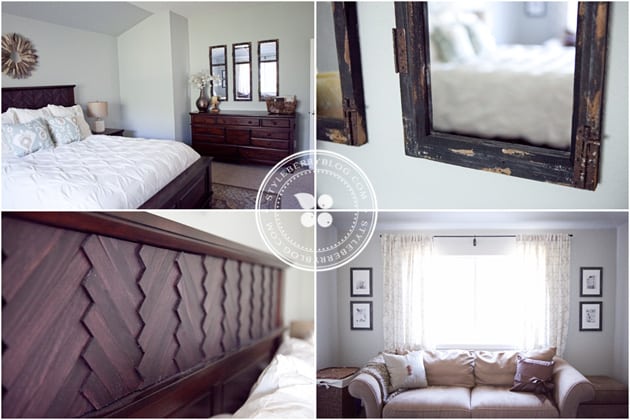
& speaking of paint color! I have seen this gorgeous chameleon of a color in several of my friends’ homes and absolutely loved it. If you aren’t yet acquainted with Restoration Hardware’s Silver Sage, then give her a look. Is she grey? green? blue? She can’t decide. She looks completely different on every wall. I specifically did not run any actions on these images because I wanted to show you how different Silver Sage looks on each wall in this room. The color is just as dynamic in person as in these images. I just LOVE that about it! It even feels like it gets lighter in the morning and darker in the evening. I’m doing everything in my power not to paint my whole downstairs Silver Sage before we move…!! I had it color matched at Lowe’s. It’s beeeeeautiful!
& something to note–I took a picture of the herringbone pattern from both angles, because the texture is different depending upon the side you view it. I love that. But just expect this if you do this pattern on something!
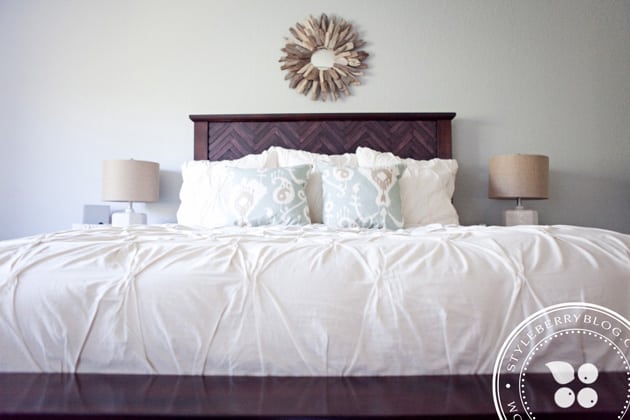
I really think you could go crazy with this technique. Tables. Trays. Full headboards. Shims come in several sizes, and the combination of wood stains is endless. I can’t wait to do it again, a little differently!
Happy woodworking!!

