Well. Life sure has taken me on a tangent here lately! A happy tangent, but a tangent nonetheless. Back to the styleberryPARTY series! :) I still have DIY tissue paper pom poms & a DIY sweet and sentimental collaborative gift on the agenda & then…lots of photography to share! :) I swear I could post something new every day…if only I had the time to blog it all!
I experimented with a new rice krispy recipe & it turned out to be such a hit that I am adding it to my permanent arsenal. I didn’t intend for it to get its own post, but it is too good (and easy!) not to share. Just disregard my image…I was rushing & rushing to photograph everything before the guests arrived that I neglected to pay attention to one of my big pet peeves: cutting important things off. I would have liked to see the entire platter & for it not to be crooked…but…well…here it is anyway. :[ flaws & all.
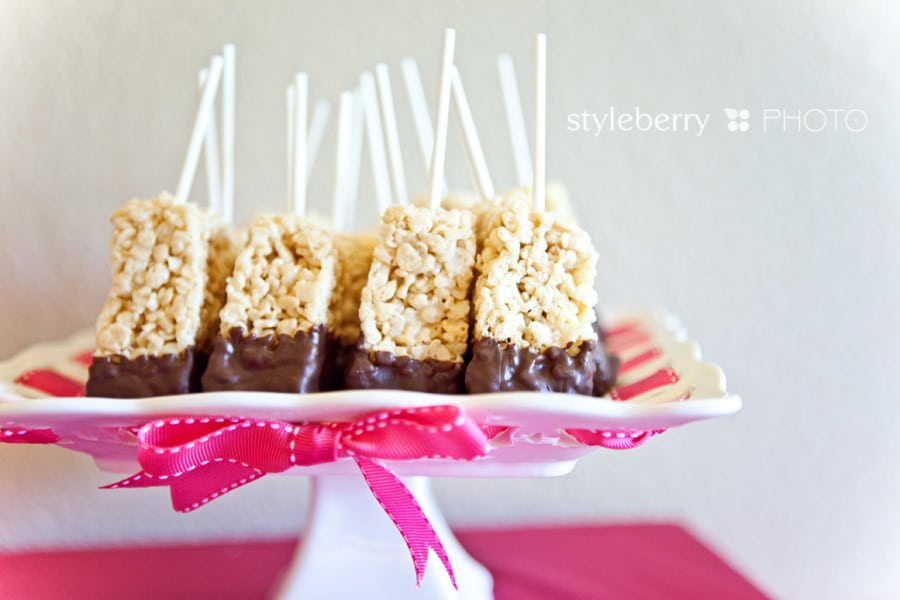
Rice Krispy Treats
Found HERE, modified
Yield: 24 squares
Ingredients
- 1/4 cup butter
- 4 cups miniature marshmallows
- 5 cups crispy rice cereal
- 2 1/2 tsp milk
- optional: chocolate for dipping (I used dark chocolate candy melts from Hobby Lobby–same as the marshmallow pops)
Preparation
- Melt butter in large sauce pan over low heat. (the real trick here is to do it slooooooowly–do not brown the butter or they will be dry)
- Add marshmallows and stir until melted and well-blended. Cook 2 minutes longer, stirring constantly.
- Add the milk & stir well. Remove from heat.
- Add cereal. Stir until well coated.
- Using buttered spatula or waxed paper, press mixture evenly and firmly in buttered 13 x 9 inch pan. (I used PAM) Cut into 2 x 2 inch squares when cool.
Modifications for chocolate dipped on a stick:
- just before the treats were completely cool I flipped them onto a cutting board & used a butcher knife to square off the edges so they were not round like the pyrex dish. then they cooled on the cutting board.
- I used the small lollipop sticks & I wish I would have used the longer sticks, as these were too short to get a good grip.
- I used the same dipping technique explained in the the chocolate dipped marshmallow pop recipe, minus the extra step at the end–just dipped once & let cool on the foil.
- every time I look at these I think they look naked…I intended to tie turquoise ribbon around the stick at the base where it meets the rice krispy, but I ran out of time! :( They would have been a lot cuter!
- & the platter was $7.99 from Homegoods, threaded with some leftover ribbon from caroline’s bumpers that just happened to fit! :)
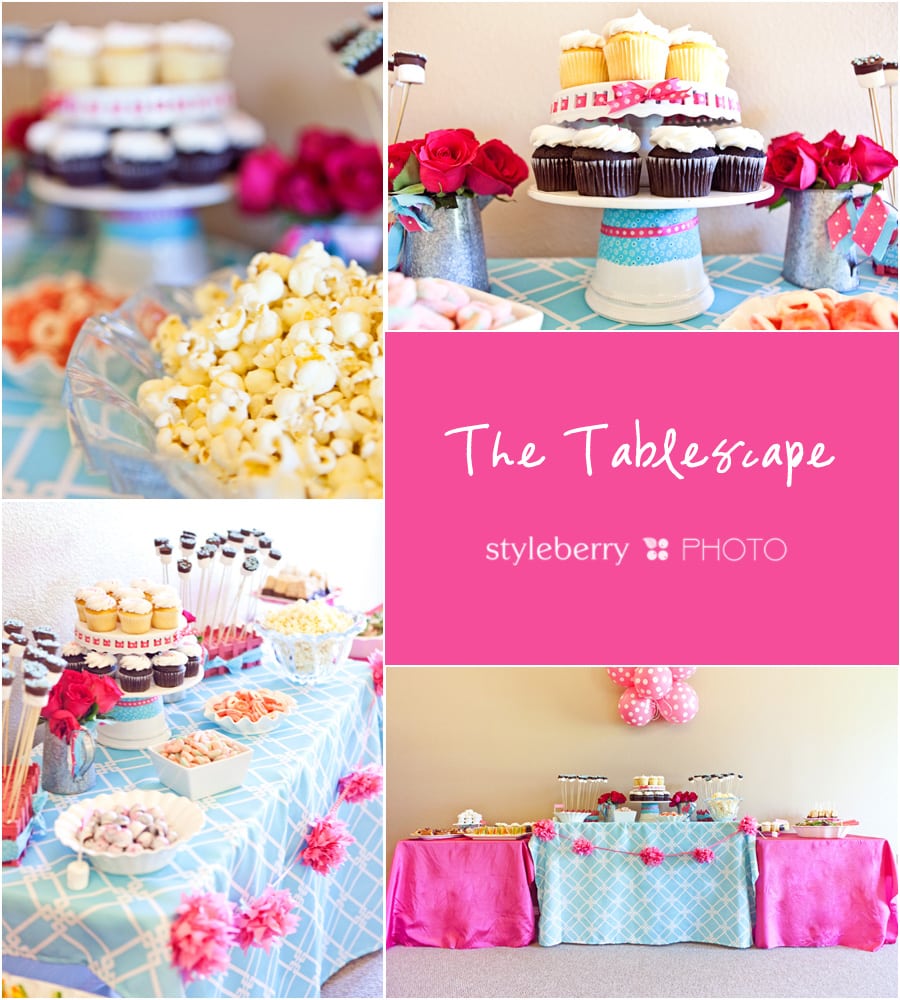
& now…the table! How do you create a pretty table? Have a vision. Bargain hunt. & keep it simple. Here is the breakdown:
- Dishes: all dishes were collected over a few weeks at Homegoods, Ross, Marshalls & TJ Maxx. The cake stands were the most expensive topping out at $13, but most were $8. The miscellaneous white dishes were all $2-8. I mixed modern & “frilly” to give the table some interesting depth. Then got creative with fabric & colors.
- I used various fabric scraps & ribbon to add little touches of color here & there. Nothing perfect. It was a bit messy & I liked it that way.
- I wanted to satisfy all her cravings–salty, sweet, sour, savory & crunchy. We had a nice array of yummy things!
- The turquoise tablecloth was a $10 find at target last month. The pink taffeta & turquoise linen fabric I scored at 90% off at a fabric store that was going out of business when I went home to California to visit. I paid about $10 for almost 15 yards. CRAZY. I’ve got fabric coming out of my ears! If only I had time to iron them properly…
- Table pom poms–more on those coming. Just mini tissue paper pom poms tied to a ribbon & pinned to the tablecloth.
- more on the flowers/vases over on the DIY details post
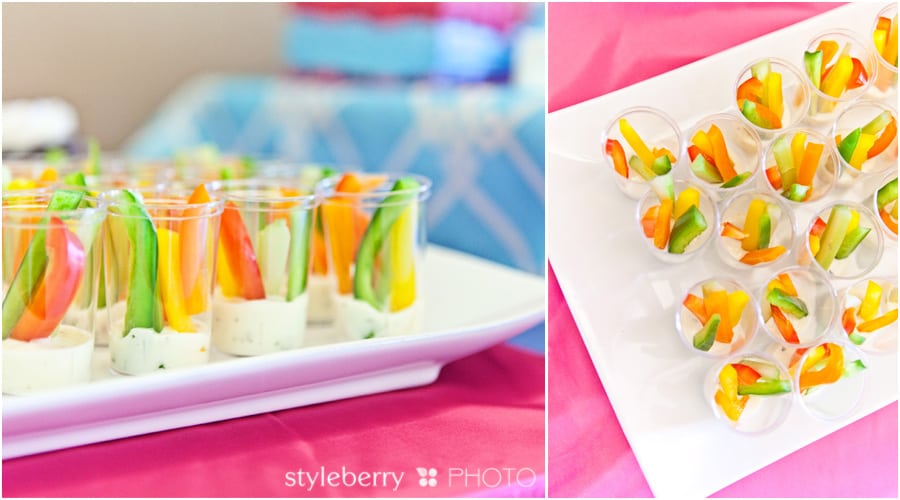
Got the idea for the veggie shooters here on Pinterest. Love them! I’ll cut them longer next time (thanks for chopping them for me, Anne!) Shooter cups were found at Party City.
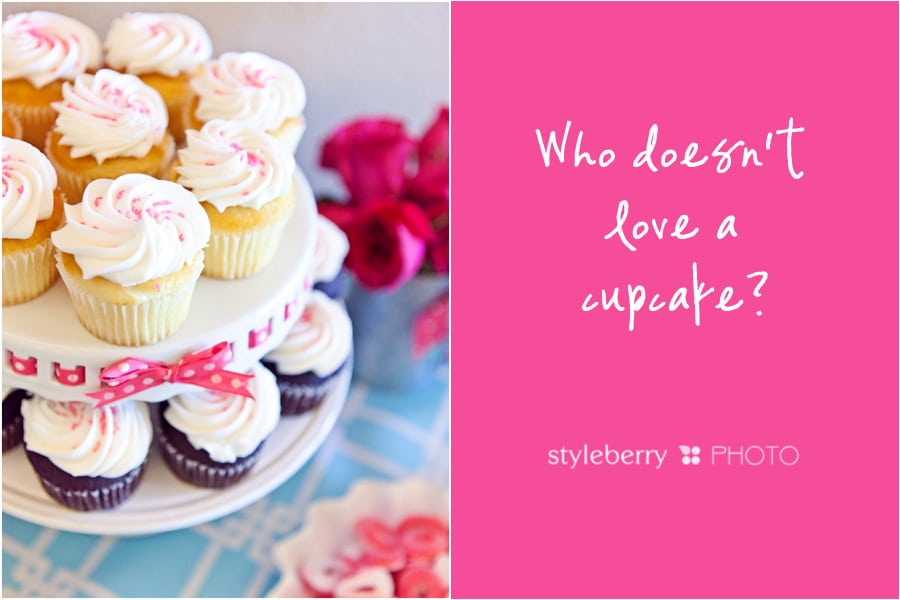
& the cupcakes. I don’t know about you, but I love a cupcake over a piece of cake. Hannah took on the task of cupcakes & was finding that the local fancy bakeries were charging almost $3 a cupcake. Well, when you need 60 of them, that isn’t so much an option if you are watching the budget. She was having trouble finding someone to match the colors so I suggested finding reasonably priced white cupcakes, then buying sprinkles that matched the party colors. I am all about keeping it simple–I think they look prettier that way anyway! So these are just cupcakes from Sam’s Club (sadly, I was too busy to ever get to eat one! boo!) with some added sprinkles! Well done, Hannah!
Hope you are getting inspired to plan a pretty fab party!

