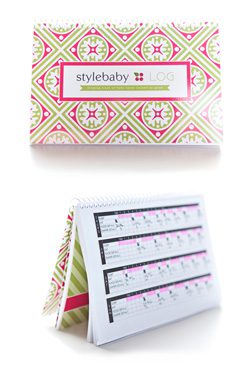
Project 52 | FOUR

Metadata: f/2.8, 1/250, ISO 250

•••

This just makes me smile. We’ve been on a lot of coffee/hot chocolate dates lately. We bring books & read. We chit chat. We especially love the sale book cart parked in the Starbucks at B&N. Tractors & bugs are the topics of choice. Always. Even cry baby, her favorite baby doll, takes part in our dates. I wouldn’t trade them for anything. I know they’ll never be quite the same as they are right now & I am making the most of them.

Coffee shops have been a large part of my life. My first date with my hubby was at one. He took me to one minutes before he proposed. I did most of the work that earned me a college degree at the one in the Marketplace in San Ramon. We went to one the morning of our wedding, just to have a moment alone. We used to go every Sunday morning in Omaha…I’d read the paper while he studied & we watched the snow fall. These days, I go with my sweet girl. or my girlfriends. and sometimes…once in a blue moon…alone. But I love the quiet. I was never a bar girl. I much prefer acoustic music, a cozy chair, & something good to read. I hope I raise kiddos who feel the same way. Good things happen at coffee shops. Sometimes really good things.

•••

& Project 52 is off to a very collaborative start! If you’d like to join in–it’s not too late. Here’s everything you need to know about

my 2012 Project 52.

& those of you who are linking up (please let me know if you need to be edited/added!):

Adventures in Mommyhood • Aubrey My Love • Blossoms & VintageBugs & Boo-Boos Candice Craves Caynay Photography Chronicles of KT The Crain’s Nest Dana Moran Photography The Daulton Dabbler Englexas Everything Eatherton Fairy Wings & Dinosaurs Finding Joy Firecracker Mama • Freckled PinkFrom Stanwood to Seoul Gin & Juice Boxes Heather Marie Portraits • Ici & LaIt’s a Strange & Lovely RideKate L Photography Keeping up with the Carters Kim Percival Photography Lizzi Photography Mahina & Lucas Mama Bethany McLain Padilla Photography Mist Moments Memories by Mere Moments & Impressions The Mommyhood Memos Moo with Me Moxie Made My Tot TravelsNavigating the Mothership • Nicole Dina PhotographyOh the Places We’ll Go Our Splendid Little Life Phreckle Face Photography Quiet Footsteps Rachel Gray PhotographyThe Robersons Shades of Bliss Shutter Mama Blog • Side of the TableSimply Us Snaps of Our Life The Todd’s We Aren’t Scared of Sugar • We’re Better Together Wicked Kate Z as in Zebra


show hide 14 comments

DIY Rag Wreath…to conquer the boredom.

My daughter has decided her meals need to take foooooooorevvvvvvvvvverrrrrrr to consume. & I am bored. Problem is…if I get up from the table, she just stops eating & resumes her much more fun than eating activity. ::sigh:: So I have felt like a prisoner at the kitchen table for nearly three hours a day…sitting…watching…barking at her to eat. & I realized that I needed to change something about the situation because it was no good for anyone. Time to find something to do while she was eating…that I could do while still maintaining some soft of eye contact & conversation with her. Enter my latest project: the DIY rag wreath.

This was completed over the course of three meals. No creativity required. Just a wire wreath form ($3, Michaels), a bunch of fabric scraps, a scissors & the ability to tie knots. I first found the idea during Kelly Moore’s awesome 12 days of DIY series. Then Julie of ZozoBugBaby had a box o’ scraps sale (I purchased one!) and well…this is what happened:

This is made out of about 95% Zozo scraps & I needed a bit extra to fill in the gaps & make the flower & leaves. I also learned that it goes faster if you use longer strips–like 1 or 2 x 5ish inches. I made the mistake of starting with strips too small & it was taking forever! So make them a little longer than you think. You can always trim.

I made the flower out of a long ruffled strip, like I showed you how to sew here & how to make into flowers here. :)

I kind of don’t want to hang it outside…it’s too cute! ;) Happy…..spring? Sure feels like it down here! & you could totally do this with seasonal fabrics/colors for a fun holiday project for the front door! Halloween…Thanksgiving…Valentine’s Day…ooh. So many ideas!

show hide 3 comments

WHEN.

Are you taking maternity leave?

You better take maternity leave.

But still take pictures! & share them! We want to see the baby!!!

Ahh. Welcome to my life.

I have never been a gal who can’t say “no.” I pretty much say “no” more than I say “yes” (a wonderful skill I have already passed onto my dear daughter) and I can manage my life because of it. This means I do the things I want to do & spend time with the people I enjoy. But lately I have been forgetting how to say “no.” & it is catching up with me. I am tired. & a bit overwhelmed. & despite having a very accomplished to-do list…I still have a lot of stuff I need–and want– to do. But I feel like a ticking time bomb. & it’s stressing me out.

So when do you say when?

Well. My when is now.

I’m choosing to live off the computer for a bit. caroline & I have very little time left as the pair we are right now and I want to enjoy every second with her. I have a couple of major projects I want to accomplish pre-baby (like my 2011 Blurb books & sewing a chair & ottoman slip cover) and I have to finish Ina May and Hypnobabies & I need to do it. Just DO it.

& take my girl to starbucks for morning chit chats over hot chocolate. & to the book store to browse the shelves for fun stories to read. & to lunch so we can enjoy our special mommy & me time.

So…I’ll still be here. Sometimes. Fridays for sure, but nothing regular other than that. If something strikes my fancy & I can find the time & energy to share, I will. I’ll be on the styleberry facebook page here & there too. But I need some down time. Some ME time. Some US time. Time to relish life as three. :)

I know you’ll understand.

I am so grateful for all of you who help to support, encourage & inspire me through your comments & your sweet facebook messages. I have about a zillion unanswered emails from many of you & it kills me that I cannot respond to each one, but I just can’t. My facebook wall is the best place to keep in contact with quick questions. I promise to reply there as time allows.

You can also direct all stylebabyLOG questions to shawna [at] stylebabyLOG [dot] com. Orders will continue to ship ASAP (usually within a day)–with the exception of the week that I deliver. You’ll get a special message should you happen to order during that crazy window. :)

You can also catch me over on my latest obsession–instagram. My username is miss_shawna and I’m pretty sure the first pics of the new babe will be there before anywhere else. :) I’m loving what I can do with my iPhone images…and it’s a fun little community too! Here’s a peek at my life through instagram…

  1. girl time…from forever ago, but it’s still one of my faves. :)
  2. eff sewing.
  3. big sky country, indeed!
  4. top pregnancy craving #3. yummm.
  5. POP!
  6. B12=sanity.
  7. yuck. yuck. yuck. trade you for snow?
  8. red toes…in hopes of a valentine’s day babe! ;)

Now…off to tackle that four post-it to-do list. Yowza.

 HAPPY MONDAY!

oooh. & I also want to direct you over to the home of my latest collaboration–a place I will now be contributing regularly! You can find my first article up today on Honest to Nod, which is the lovely & inspirational blog from The Land of Nod. I’ve shared my love of all things Nod before, but it is one of my absolute favorite places to shop for my caroline! :)

show hide 12 comments

Project 52 | THREE

  Metadata: f/2.8, 1/13, ISO 6400

•••

I often get asked how I “do it all.” & the truth is…I don’t. I make choices. I let go of what doesn’t matter to me & cling tight to what does. But one thing that really affects my productivity is my schedule. I can pretty comfortably survive on about 6-6.5 hours of sleep, just so long as I get to sleep past eight am. If you’re an avid reader of this blog, you know I am a major night owl (up until about 2am usually) but I am also a morning sleeper. & thank goodness my girl is too. I absolutely dread the day where she has to get up for school & get there by 730. I am just not wired for that. I sleep 2-8ish. & that works for us…but someday it won’t!

Lately, my girl has followed my sleep patterns. Despite getting tucked in at eight, she’s reading and playing and all over her room (though gated in) and awake until about ten. I absolutely love going upstairs & seeing how I find her. She’s been asleep on the floor lately…sometimes missing clothing (or adding it!) and often surrounded by babies & books. It’s pretty funny. I hope someday she finds my iphone snaps as amusing as I do. (& don’t worry…I always carry her back into bed & tuck her in…again.)

Oh, to be two.

& ’cause I know you’ll ask, her room details can be found here: the nursery & nursery details. The bed was her crib that we converted. & her amazing duvet & shams are from Land of Nod & are on sale now! There are some great deals to be had here:

& I know I am missing some of you on this list below. PLEASE let me know if you are participating & I missed your link!

Also, many of you are having trouble with copying & pasting my button. Do any of you have a great “grab a button” widget? Mine is obviously not working. If you want my button & can’t get it above, email me at shawna [at] styleberryPHOTO [dot] com. ;)

•••

& Project 52 is off to a very collaborative start! If you’d like to join in–it’s not too late. Here’s everything you need to know about

my 2012 Project 52.

& those of you who are linking up (please let me know if you need to be edited/added!):

Adventures in Mommyhood • Aubrey My Love Bugs & Boo-Boos Candice Craves Caynay Photography Chronicles of KT The Crain’s Nest Dana Moran Photography The Daulton Dabbler Englexas Everything Eatherton Fairy Wings & Dinosaurs Finding Joy Firecracker Mama From Stanwood to Seoul Gin & Juice Boxes Heather Marie Portraits Kate L Photography Keeping up with the Carters Kim Percival Photography Lizzi Photography Mahina & Lucas Mama Bethany McLain Padilla Photography Mist Moments Memories by Mere Moments & Impressions The Mommyhood Memos Moo with Me Moxie Made My Tot Travels Navigating the Mothership Oh the Places We’ll Go Our Splendid Little Life Phreckle Face Photography Quiet Footsteps Rachel Gray PhotographyThe Robersons Shades of Bliss Shutter Mama Blog Simply Us Snaps of Our Life The Todd’s We Aren’t Scared of Sugar Wicked Kate Z as in Zebra


show hide 27 comments

DIY Barn Doors (on a budget!)

I don’t know about you, but the one thing pinterest totally helped me fall in love with was the idea of interior barn doors. They kept popping up every time I logged on & I was so inspired. There were all kinds, all price ranges. But they were functional and beautiful & I had just the right place for them. This DIY Barn Door Project was my favorite & definitely inspired this project.

We’ve been converting a room in our home that has no doors into our hybrid office/guest room space. It used to be just an office. & then we added the daybed. Now with all of our rooms full upstairs, we need a little bit of privacy for our out-of-town guests downstairs. Barn doors seemed like the perfect economical solution…until I started price shopping…

Many interior barn doors are hung with Flat Track Barn Door Hardware. As simple as it is, each 4 ft track will set you back no less than $500. Not including the doors. Well…I knew we needed about 10ft of track. & we’re a military family. Translation: we’re moving soon & I do not put much $$ into my house–especially if I can’t take it with me. So with a hardware total skyrocketing above $900 before we even started talking about doors, I had to start brainstorming. What are the options? What do farmers use on their BARNS? Surely not hardware that costs $900 right? Well. The answer was NO.

A little creative thinking, some time googling, a few phone calls & a tip from my uncle (who used to own a farm store in Wisconsin) & I was at the Tractor Supply Store picking up hardware. Turns out you can buy a 10 ft box rail for $36 and trolley hangers for about $20 a pair. That makes my hardware investment under $100. Score one for my bargain shopping skills. ;) I’ll give you a supply list for our entire project–show you how we did it–& all for about $300. Not even kidding!

Barn Door HARDWARE Supplies:

Barn DOOR supplies (all purchased at Lowe’s w/ our 10% military discount):

  • Whiteboard Wood- 1x10x10 (x 8, used four vertically for each door, cut to correct height)
  • Whiteboard Wood-1x10x8 (x 2, used horizontally across top & bottom of doors)
  • Whiteboard Wood-1x6x10 (x2, used horizontally across middle of doors)
  • Whiteboard Wood-1x10x12 (used across the top to hide the track)
  • Whiteboard Wood-1x6x8 (cut lengthwise, to fix the whoops, more on that below)
  • L brackets (to mount track hiding piece)
  • drywall screws (to screw wood for doors together)
  • door pulls
  • Paint (I used about 2/3 of a gallon of high gloss white) & supplies to paint

& here’s how it was done:

The track plan:

The door plan:

& my awesome helper:

I painted all the wood before we assembled it into doors. Each piece took two coats all the way around

I used this paint…because it was the cheapest. It worked great! I rolled it on & used the brush to touch up the sides.

& please, please, please learn from my mistake. We got ready to assemble & pieced all the wood together…only to learn that 1 x 1 x 10 really meant .75 x .75 x 9.25. All my horizontal cuts were off because the wood was NOT the dimensions listed on the signs at Lowe’s! Apparently this is normal–so do your math in person! Do not trust the posted dimensions!

Post bedtime door assembly.

During assembly I decided against my original door plan & left off the diagonal accents. I like it better without them.

Next up…getting the track up so we could hang the doors! My hubby found the studs & drilled holes in the box rail while I was painting. We used really long screws to sink the track flush to the ceiling, making sure it was solidly into the studs above.

You’ll notice my rail is just a bit short for the opening. We didn’t have a saw that could slice through the metal box rail so we opted to get a rail that was about five inches short on each side. Since the doors aren’t that heavy, it’s structurally ok (the track can hold up to 400lbs) –but if you want it perfect, the rail should run wall to wall.

Here’s one door mid-installation with the hardware still exposed. You can see the “whoopsie” board on the right–it was our fix for the dimension problem above.

I painted another board to cover the hardware & we added L brackets to hang it into the studs.The L brackets had to be short, because they sat next to the track on the ceiling when mounted.

I then painted the trolley hangers white, because they stuck out just a wee bit from under the “hardware hider” & I could see them from where I stood below.

But I kind of love my barn doors. :)

& if you can use a power drill, stud finder & can sweet talk someone at Lowe’s into doing all your cuts for you…this project is easy as pie. Building “barn doors” is really not that hard!

Total work time: 2 naps & one evening.

You could totally do it.

Promise.

& they do slide. Just realized I have no pictures of them closed–but indeed, my DIY barn doors are functional! ;)

show hide 13 comments

FIFTEEN. | styleberryINSPIRE

Today marks the start of the fifteenth year that my hubby & I have been together. I think that is rad.

I am so lucky to have such a wonderful man to share this life with. He is exactly the kind of father I always dreamed my kids would have. I count my blessings daily.

We’ve now been together exactly half our lives. ;) I love that.

photo credits: second: Lisa Ann Krutzik, third: Nicole Dina Photography


Hard to believe there were 10 years in between that first picture & the last. :) (& yes, I was like, totally blonde, until 2007)

& I had planned on DIY barn doors today…but a croupy-cranky-molar sprouting toddler has kept me up & exhausted for the last several nights. So…they’re next. But not quite ready yet…

show hide 6 comments

Project 52 | TWO

Metadata: f/2.8, 1/160, ISO 640 — f/2.8, 1/160, ISO 800

•••

Sneak peek at the very unfinished nursery! It’s coming to life & I love it more than words can even express. It’s so bright & airy & serene. I can’t wait to spend more time in there. Let the sewing commence…(you can see my plan here)

One day before nap time we were both in there looking around & talking about where the new baby is going to sleep. All of a sudden caroline got a very distressed look on her face & declared “I be right back!” & off she went. She returned with all her beloved babies & lovies and some of her very favorite books. “Her have p-riends and books!” she said. (caroline is 100% sure it is a baby sister–& even when we talk about the fact that it might be a little brother, she firmly responds, “NOPE. It’s a wittle gurl!”) I hope she shares this well in a few weeks! :)

•••

& Project 52 is off to a very collaborative start! If you’d like to join in–it’s not too late. Here’s everything you need to know about

my 2012 Project 52.

& those of you who are linking up (please let me know if you need to be edited/added!):

Adventures in Mommyhood Bugs & Boo-Boos Candice Craves Caynay Photography Chronicles of KT The Crain’s Nest Dana Moran Photography The Daulton Dabbler Englexas Everything Eatherton Fairy Wings & Dinosaurs Finding Joy Firecracker Mama From Stanwood to Seoul Gin & Juice Boxes Heather Marie Portraits Kate L Photography Keeping up with the Carters Kim Percival Photography Lizzi Photography Mahina & Lucas Mama Bethany McLain Padilla Photography Mist Moments Memories by Mere Moments & Impressions The Mommyhood Memos Moo with Me Moxie Made My Tot Travels Navigating the Mothership Oh the Places We’ll Go Our Splendid Little Life Phreckle Face Photography Quiet Footsteps The Robersons Shades of Bliss Shutter Mama Blog Simply Us Snaps of Our Life The Todd’s We Aren’t Scared of Sugar Wicked Kate Z as in Zebra

show hide 29 comments

DIY No Sew Burlap Bedskirt

So…I have a sewing machine. But I’ll find any way NOT to use it. I just do not love to sew! I sure wish I did…but my glue gun is my go-to gadget! It’s fast…it’s efficient…it’s low maintenance. Just how I like things. The only problem? You can’t really wash what you glue. But who really washes bedskirts all that often? Not me! This was the perfect project to tackle sans sewing machine!

I am in love with all things burlap this year. & the rest of this city must be too, because it took me four stores to locate a very basic color burlap for this project! I wound up getting it dirt cheap–this entire bedskirt was under $15, probably less. I don’t remember exactly. But burlap is CHEAP! & looks excellent with white or ivory linens. Casual comfort. So here’s how I took a simple piece of burlap & turned it into a preppy, affordable, low maintenance bed skirt for my guest bed/day bed project.

My inspiration for the bedskirt was a total accident. I had a short little remnant of burlap from another project that I stuck under the ruched duvet I made just to see what it looked like. The way it was rolled on the bolt at the store creased it & made it look like it had a little stripe near the bottom. I LOVED how it looked…I could so do that with a scissors & glue. & I was determined to make it happen. Here’s the piece that inspired me:

I measured my piece of burlap to the right drop length for my box spring, & added a few inches so I could cut a stripe out of the same length.

I hot glued what would be the bottom of the bedskirt first, simply folding it over about an inch, ironing it & hot gluing it into place. You can see it on the left below. It looks like a finished edge.

My very precise way of measuring the accent stripe…was an 8.5″ x 11″ piece of paper, folded in half–hot dog style.

I simply moved it down the burlap & was able to cut a pretty darn straight line that way. Super easy.

Once the accent stripe was cut, I refolded my sheet of paper into thirds, and laid it out along the paper.

I continued to do this down the whole length of the bedskirt. I added a vertical strip of glue every so often, along with horizontal strips, to adhere the accent stripe to the main skirt.

*BIG TIP: Once you squirt the hot glue on the burlap wait a couple of seconds before pressing it down into place. The glue will harden just a bit, keeping it from seeping through the burlap. This trick kept the glue from showing on the finished side of the accent stripe.

Once my stripe was secured into place, it was time to secure it to the boxspring! My hubby’s giant books sure came in handy. I am sure he’s glad I am getting their money’s worth out of them too…

I propped the mattress up & used industrial strength sticky backed velcro to attach strips of velcro to both the bedskirt AND the box spring. You can see them in the corner, in an L shape. I did this up & down the box spring, then attached the velcro to the bedskirt so it hit at the right length.

To create the corner pleat, I simply folded the burlap over itself, temporarily pinned, then hot glued it nice & secure into place.

I did end up fraying the edges of the accent stripe just a bit, so it had more texture. You can literally just rip the strands of burlap until you get the desired look. The edges will fray pretty evenly.

Pretty darn easy.

I really love how it turned out…

& as you saw yesterday in the DIY Chevron Pillow tutorial…it perfectly accents my comfy, natural, cozy daybed!

I love this room!! I’m so having our next family photo in this space…it has such beautiful light!

Related Posts with Thumbnails

show hide 6 comments

G R A B   A   B U T T O N